
BareCMS
A lightweight, open-source headless CMS designed with bare minimalism in mind






📋 Table of Contents
- 🎬 Demo
- ✨ Features
- 🚀 Quick Start
- 🐳 Deployment
- 📖 Documentation
- 🧪 API Reference
- 🤝 Contributing
- 🗺️ Roadmap
- 💬 Community
- 📄 License
- 💖 Support
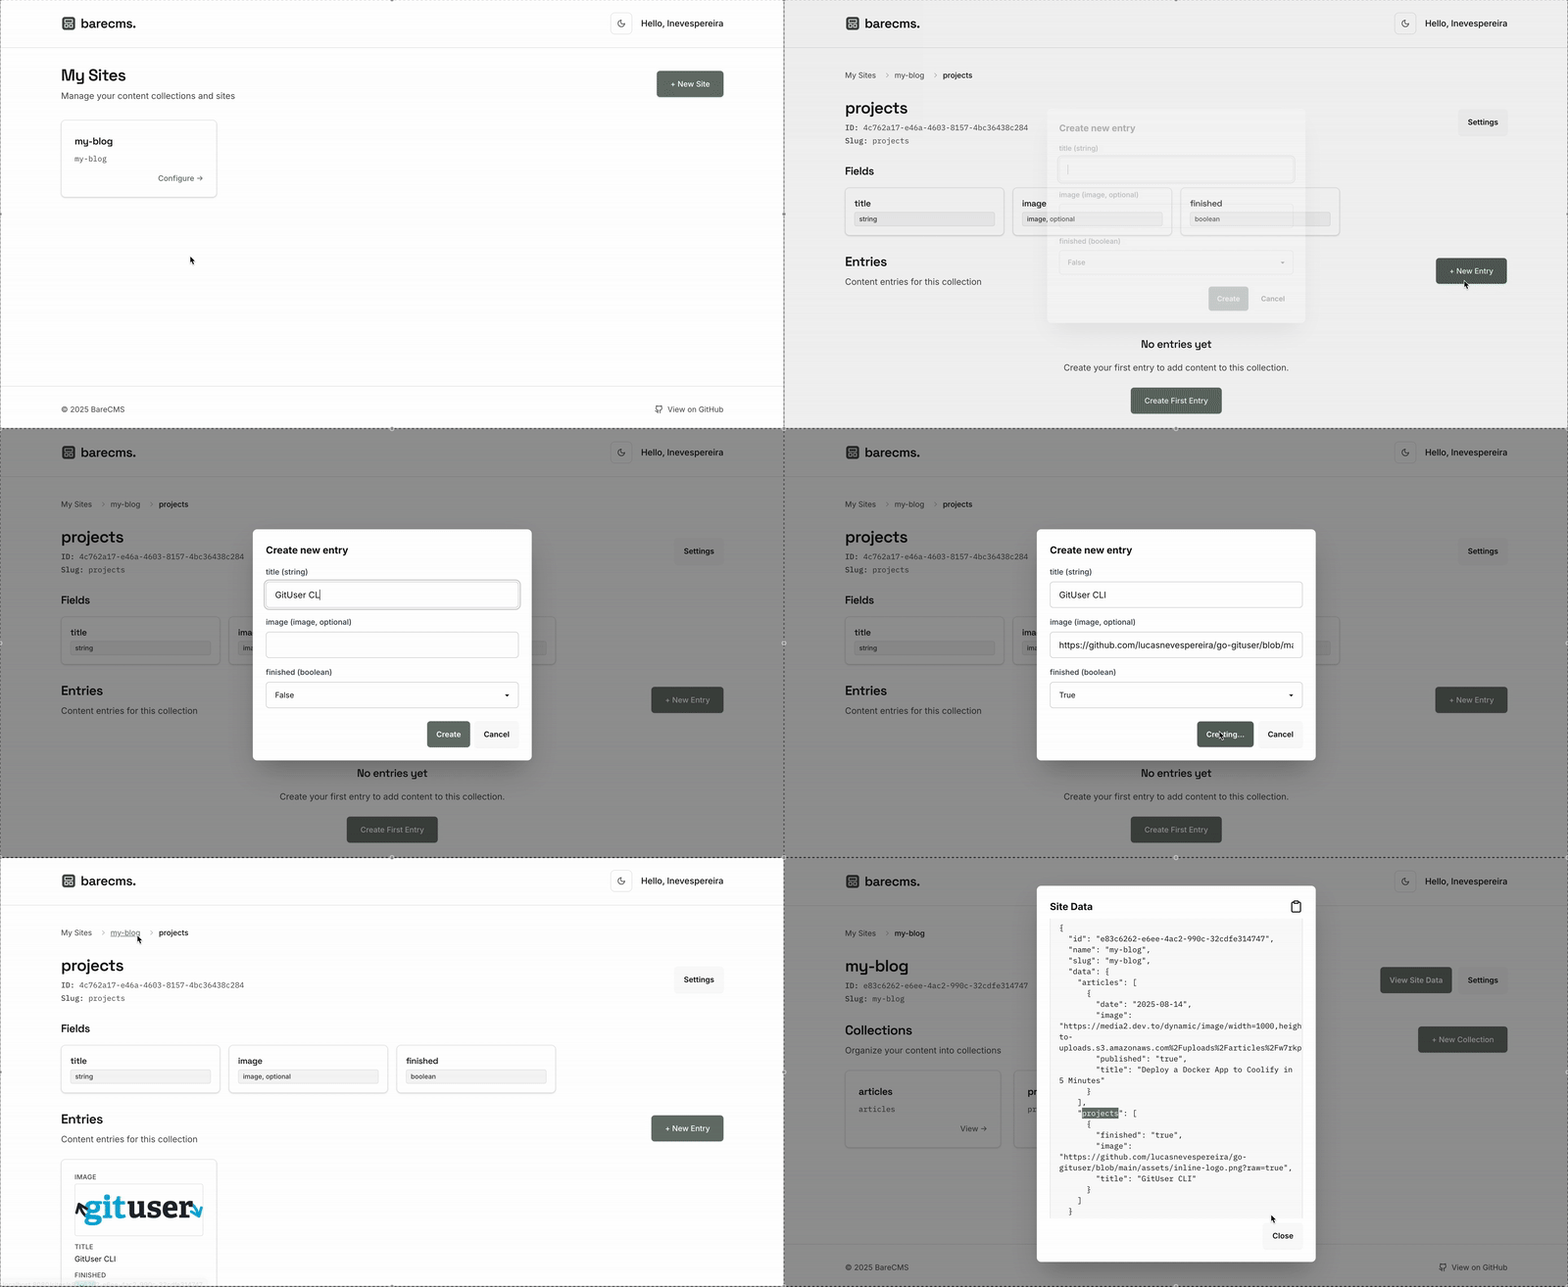
🎬 Demo
✨ Features
- 🎯 Minimalist Design: Clean, intuitive interface focused on content management
- ⚡ Fast & Lightweight: Built with performance in mind using Go and React
- 🔧 Headless Architecture: Use any frontend framework or static site generator
- 🐳 Docker Ready: Easy deployment with Docker and Docker Compose
- 🔐 Secure Authentication: JWT-based authentication system
- 🗃️ Flexible Content Management: Support for sites, collections, and entries
- 🚀 Production Ready: Built with scalability and reliability in mind
🚀 Quick Start
Prerequisites
For Quick Deployment:
- Docker
- Docker Compose
- Make (optional, for simplified commands)
For Local Development:
Installation
- Clone the repository
  git clone https://github.com/snowztech/barecms.git
  cd barecms
- Set up environment variables
cp .env.example .env
Edit .env and update the JWT_SECRET with a strong, random string:
# Generate a secure JWT secret
openssl rand -base64 32
- Start the application
make up
- Access BareCMS
Open your browser and navigate to http://localhost:8080
Development Commands
make up       # Start development environment
make ui       # Build UI (frontend)
make clean    # Stop and cleanup containers
make logs     # View application logs
make help     # Show all available commands
🐳 Deployment
Docker Compose (Recommended)
Step 1: Create your project directory
mkdir barecms-app && cd barecms-app
Step 2: Create configuration files
Create .env file:
# Security (REQUIRED)
JWT_SECRET=your-super-secret-jwt-key-here

# Database Configuration
POSTGRES_USER=barecms_user
POSTGRES_PASSWORD=your-secure-password
POSTGRES_DB=barecms_db
DATABASE_URL=postgresql://barecms_user:your-secure-password@postgres:5432/barecms_db

# Application
PORT=8080
Create a docker-compose.yml file with the following content:
services:
  postgres:
    image: postgres:16-alpine
    env_file: .env
    volumes:
      - postgres_data:/var/lib/postgresql/data
    healthcheck:
      test: ["CMD-SHELL", "pg_isready -U ${POSTGRES_USER} -d ${POSTGRES_DB}"]
      interval: 5s
      timeout: 5s
      retries: 5
    restart: unless-stopped

  barecms:
    image: ghcr.io/snowztech/barecms:latest
    ports:
      - "${PORT:-8080}:8080"
    env_file: .env
    depends_on:
      postgres:
        condition: service_healthy
    restart: unless-stopped

volumes:
  postgres_data:
Step 3: Launch BareCMS
docker-compose up -d
🎉 BareCMS is now running at http://localhost:8080
Management Commands
# View logs
docker compose logs -f barecms

# Stop BareCMS
docker compose down

# Update to latest version
docker compose pull && docker compose up -d

# Backup database
docker compose exec postgres pg_dump -U barecms_user barecms_db > backup.sql

# Access database shell
docker compose exec postgres psql -U barecms_user -d barecms_db
Docker Only
For direct Docker usage without Compose:
# 1. Start PostgreSQL
docker run -d --name barecms-postgres \
  -e POSTGRES_USER=barecms_user \
  -e POSTGRES_PASSWORD=your-secure-password \
  -e POSTGRES_DB=barecms_db \
  -v postgres_data:/var/lib/postgresql/data \
  postgres:16-alpine

# 2. Start BareCMS (wait ~30 seconds for postgres to be ready)
docker run -d --name barecms-app \
  -p 8080:8080 \
  -e JWT_SECRET=your-super-secret-jwt-key-here \
  -e DATABASE_URL=postgresql://barecms_user:your-secure-password@barecms-postgres:5432/barecms_db \
  --link barecms-postgres \
  ghcr.io/snowztech/barecms:latest
📖 Documentation
- Live Documentation - Complete documentation
- Contributing Guide - How to contribute to BareCMS
- API Documentation - Complete API reference
- Self Hosting Guide - Complete Self Hosting Guide
🧪 API Reference
🌐 Public Data Access
Retrieve all site content publicly without authentication. This is the primary endpoint for headless usage.
Endpoint: GET /api/:siteSlug/data
Description: Returns all collections and entries for a site using its slug. BareCMS keeps it simple by organizing all content under a data field, where each collection is accessible by its slug containing an array of entries with their field values directly accessible.
Parameters:
siteSlug(path) - The unique slug of the site
Example Request:
curl -X GET http://localhost:8080/api/myblog/data
Example Response:
{
  "id": "44394f36-daa3-451c-970f-59238c46ce36",
  "name": "myblog",
  "slug": "myblog",
  "data": {
    "articles": [
      {
        "content": "this is my article post content",
        "draft": "false",
        "published": "2025-07-21",
        "title": "my sample article"
      }
    ],
    "products": [
      {
        "name": "Sample Product",
        "price": "29.99",
        "description": "A great product for everyone"
      }
    ]
  }
}
Response Structure:
id- The unique identifier of the sitename- The name of the siteslug- The URL-friendly slug of the sitedata- Object containing all collections, where:- Each key is a collection slug (e.g., "articles", "products")
- Each value is an array of entries for that collection
- Entry objects contain field names as keys with their values directly accessible (no nested
dataobject)
This simple structure makes it easy to consume in frontend applications - you can directly access response.data.articles to get all articles, or response.data.products for products, etc.
Quick Usage Example
const barecmsHost = "http://localhost:8080";

// Fetch all data for a site
async function fetchSiteData(siteSlug) {
  try {
    const response = await fetch(`${barecmsHost}/api/${siteSlug}/data`);
    const data = await response.json();
    return data;
  } catch (error) {
    console.error("Error fetching site data:", error);
  }
}

// Usage
fetchSiteData("my-blog").then((data) => {
  console.log(data.data.articles); // Access your articles
  console.log(data.data.products); // Access your products
});
📚 Complete API Documentation
For detailed documentation of all authentication and content management endpoints, see API.md.
🤝 Contributing
We welcome contributions from the community! Whether you're fixing bugs, adding features, or improving documentation, your help is appreciated.
How to Contribute
- Fork the repository
- Create a feature branch:
git checkout -b feature/amazing-feature - Make your changes and test them thoroughly
- Commit your changes:
git commit -m 'Add amazing feature' - Push to your branch:
git push origin feature/amazing-feature - Open a Pull Request
Development Guidelines
- Follow Go best practices and conventions
- Update documentation when needed
- Use conventional commit messages
- Ensure your code passes all CI checks
For detailed contributing guidelines, see CONTRIBUTING.md.
🗺️ Roadmap
🔄 Current Focus
- Enhanced documentation
- Improve auth flow
- Content import/export
Keep it simple. Suggest features that align with our minimal philosophy.
💬 Community
- 🐛 Report Issues: GitHub Issues
- 💬 Discussions: GitHub Discussions
- 🚀 Want to see a feature?: Open a issue
License
MIT License. See the LICENSE file for details.
💖 Support
BareCMS is free and open source, inspired by the need for a truly minimal yet powerful CMS solution.
If BareCMS helps you build something awesome, ⭐ star the repo or ❤️ support the project
Built with care by SnowzTech • Keep it simple