npm i @stackbit/gatsby-plugin-menus babel-runtime chokidar classnames fs-extra gatsby gatsby-image gatsby-plugin-netlify gatsby-plugin-netlify-cms gatsby-plugin-sass gatsby-plugin-react-helmet gatsby-plugin-typescript  --legacy-peer-deps


git checkout 307a5cd        # check out the commit that you want to reset to
git checkout -b fixy        # create a branch named fixy to do the work
git merge -s ours master    # merge master's history without changing any files
git checkout master         # switch back to master
git merge fixy              # and merge in the fixed branch
git push                    # done, no need to force push!
Basic Web Development Environment Setup (CLICK HERE)
Windows Subsystem for Linux (WSL) and Ubuntu
Test if you have Ubuntu installed by typing "Ubuntu" in the search box in the bottom app bar that reads "Type here to search". If you see a search result that reads "Ubuntu 20.04 LTS" with "App" under it, then you have it installed.
1.  In the application search box in the bottom bar, type "PowerShell" to find the application named "Windows PowerShell"
2.  Right-click on "Windows PowerShell" and choose "Run as administrator" from the popup menu
3.  In the blue PowerShell window, type the following: `Enable-WindowsOptionalFeature -Online -FeatureName Microsoft-Windows-Subsystem-Linux`
4.  Restart your computer
5.  In the application search box in the bottom bar, type "Store" to find the application named "Microsoft Store"
6.  Click "Microsoft Store"
7.  Click the "Search" button in the upper-right corner of the window
8.  Type in "Ubuntu"
9.  Click "Run Linux on Windows (Get the apps)"
10. Click the orange tile labeled **"Ubuntu"** Note that there are 3 versions in the Microsoft Store… you want the one just entitled 'Ubuntu'
11. Click "Install"
12. After it downloads, click "Launch"
13. If you get the option, pin the application to the task bar. Otherwise, right-click on the orange Ubuntu icon in the task bar and choose "Pin to taskbar"
14. When prompted to "Enter new UNIX username", type your first name with no spaces
15. When prompted, enter and retype a password for this UNIX user (it can be the same as your Windows password)
16. Confirm your installation by typing the command `whoami 'as in who-am-i'`followed by Enter at the prompt (it should print your first name)
17. You need to update your packages, so type `sudo apt update` (if prompted for your password, enter it)
18. You need to upgrade your packages, so type `sudo apt upgrade` (if prompted for your password, enter it)
Git
Git comes with Ubuntu, so there's nothing to install. However, you should configure it using the following instructions.
Open an Ubuntu terminal if you don't have one open already.
You need to configure Git, so type git config --global user.name "Your Name" with replacing "Your Name" with your real name.
You need to configure Git, so type git config --global user.email [email protected] with replacing "[email protected]" with your real email.
Note: if you want git to remember your login credentials type:
git config --global credential.helper store
Google Chrome
Test if you have Chrome installed by typing "Chrome" in the search box in the bottom app bar that reads "Type here to search". If you see a search result that reads "Chrome" with "App" under it, then you have it installed. Otherwise, follow these instructions to install Google Chrome.
Node.js
Test if you have Node.js installed by opening an Ubuntu terminal and typing node --version. If it reports "Command 'node' not found", then you need to follow these directions.
In the Ubuntu terminal, type sudo apt update and press Enter
In the Ubuntu terminal, type sudo apt install build-essential and press Enter
In the Ubuntu terminal, type curl -o- https://raw.githubusercontent.com/nvm-sh/nvm/v0.35.2/install.sh | bash and press Enter
In the Ubuntu terminal, type ../.bashrc and press Enter
In the Ubuntu terminal, type nvm install --lts and press Enter
Confirm that node is installed by typing node --version and seeing it print something that is not "Command not found"!
Unzip
You will often have to download a zip file and unzip it. It is easier to do this from the command line. So we need to install a linux unzip utility.
In the Ubuntu terminal type: sudo apt install unzip and press Enter
Mocha.js
Test if you have Mocha.js installed by opening an Ubuntu terminal and typing which mocha. If it prints a path, then you're good. Otherwise, if it prints nothing, install Mocha.js by typing npm install -g mocha.
Python 3
Ubuntu does not come with Python 3. Install it using the command sudo apt install python3. Test it by typing python3 --version and seeing it print a number.
Note about WSL
As of the time of writing of this document, WSL has an issue renaming or deleting files if Visual Studio Code is open. So before doing any linux commands which manipulate files, make sure you close Visual Studio Code before running those commands in the Ubuntu terminal.
```bash
find $dir -type f | sed 's|\(.*/\)[^A-Z]*\([A-Z].*\)|mv \"&\" \"\1\2\"|' | sh

find $dir -type d | sed 's|\(.*/\)[^A-Z]*\([A-Z].*\)|mv \"&\" \"\1\2\"|' | sh

for i in *.html; do mv "$i" "${i%-*}.html"; done

for i in *.*; do mv "$i" "${i%-*}.${i##*.}"; done

---
### Description: combine the contents of every file in the contaning directory.

>Notes: this includes the contents of the file it's self...

###### code:

```js
//APPEND-DIR.js
const fs = require('fs');
let cat = require('child_process')
  .execSync('cat *')
  .toString('UTF-8');
fs.writeFile('output.md', cat, err => {
  if (err) throw err;
});
Description: recursively unzips folders and then deletes the zip file by the same name
Notes:
code
find . -name "*.zip" | while read filename; do unzip -o -d "`dirname "$filename"`" "$filename"; done;

find . -name "*.zip" -type f -print -delete
7. git pull keeping local changes
Description
Notes:
code
git stash
git pull
git stash pop
8. Prettier Code Formatter
Description
Notes:
code
sudo npm i prettier -g

prettier --write .
9. Pandoc
Description
Notes:
code
find ./ -iname "*.md" -type f -exec sh -c 'pandoc --standalone "${0}" -o "${0%.md}.html"' {} \;

find ./ -iname "*.html" -type f -exec sh -c 'pandoc --wrap=none --from html --to markdown_strict "${0}" -o "${0%.html}.md"' {} \;

find ./ -iname "*.docx" -type f -exec sh -c 'pandoc "${0}" -o "${0%.docx}.md"' {} \;
``---
10. Gitpod Installs
Description
Notes:
code
sudo apt install tree
sudo apt install pandoc -y
sudo apt install rename -y
sudo apt install black -y
sudo apt install wget -y
npm i lebab -g
npm i prettier -g
npm i npm-recursive-install -g
black .

prettier --write .
npm-recursive-install
11. Repo Utils Package
Description: my standard repo utis package
Notes:
code
npm i @bgoonz11/repoutils
12. Unix Tree Package Usage
Description
Notes:
code
tree -d -I  'node_modules'

tree  -I  'node_modules'

tree -f  -I  'node_modules' >TREE.md

tree -f -L 2  >README.md

tree -f  -I  'node_modules' >listing-path.md

tree -f  -I  'node_modules' -d >TREE.md

tree -f >README.md
sudo sed -i '/githubusercontent/d' ./*sandbox.md

sudo sed -i '/githubusercontent/d' ./*scrap2.md

sudo sed -i '/github\.com/d' ./*out.md

sudo sed -i '/author/d' ./*
20. Remove duplicate lines from a text file
Description
Notes:
//...syntax of uniq...//
$uniq [OPTION] [INPUT[OUTPUT]]
The syntax of this is quite easy to understand. Here, INPUT refers to the input file in which repeated lines need to be filtered out and if INPUT isn't specified then uniq reads from the standard input. OUTPUT refers to the output file in which you can store the filtered output generated by uniq command and as in case of INPUT if OUTPUT isn't specified then uniq writes to the standard output.
Now, let's understand the use of this with the help of an example. Suppose you have a text file named kt.txt which contains repeated lines that needs to be omitted. This can simply be done with uniq.
Description: Creates an index.html file that contains all the files in the working directory or any of it's sub folders as iframes instead of anchor tags
26. Filter Corrupted Git Repo For Troublesome File
Description
Notes:
code
git filter-branch --index-filter 'git rm -r --cached --ignore-unmatch assets/_index.html' HEAD
27. OVERWRITE LOCAL CHANGES
Description
Important: If you have any local changes, they will be lost. With or without --hard option, any local commits that haven't been pushed will be lost.[*]
If you have any files that are not tracked by Git (e.g. uploaded user content), these files will not be affected.
Notes:
First, run a fetch to update all origin/ refs to latest:
code
git fetch --all
## Backup your current branch:

git branch backup-master
## Then, you have two options:

git reset --hard origin/master
## OR If you are on some other branch:

git reset --hard origin/<branch_name>
## Explanation:
## git fetch downloads the latest from remote without trying to merge or rebase anything.

## Then the git reset resets the master branch to what you just fetched. The --hard option changes all the files in your working tree to match the files in origin/master
git fetch --all
git reset --hard origin/master
28. Remove Submodules
Description: To remove a submodule you need to
Notes:
Delete the relevant section from the .gitmodules file.
Stage the .gitmodules changes git add .gitmodules
Delete the relevant section from .git/config.
Run git rm --cached path_to_submodule (no trailing slash).
Run rm -rf .git/modules/path_to_submodule (no trailing slash).
Commit git commit -m "Removed submodule "
Delete the now untracked submodule files rm -rf path_to_submodule
npm i mediumexporter -g

mediumexporter https://medium.com/codex/fundamental-data-structures-in-javascript-8f9f709c15b4 >ds.md
36. Delete files in violation of a given size range (100MB for git)
Description
Notes:
code
find . -size +75M -a -print -a -exec rm -f {} \;

find . -size +98M -a -print -a -exec rm -f {} \;
37. download all links of given file type
Description
Notes:
code
wget -r -A.pdf https://overapi.com/git
38. Kill all node processes
Description
Notes:
code
killall -s KILL node
39. Remove string from file names recursively
Description: In the example below I am using this command to remove the string "-master" from all file names in the working directory and all of it's sub directories
code
find <mydir> -type f -exec sed -i 's/<string1>/<string2>/g' {} +

find . -type f -exec rename 's/-master//g' {} +
Notes: The same could be done for folder names by changing the -type f flag (for file) to a -type d flag (for directory)
find <mydir> -type d -exec sed -i 's/<string1>/<string2>/g' {} +

find . -type d -exec rename 's/-master//g' {} +
40. Remove spaces from file and folder names recursively
Description: replaces spaces in file and folder names with an _ underscore
Notes: need to run sudo apt install rename to use this command
98 rRmove text target="parent" from files called right.html
Description
Notes:
code
find . -name *right.html  -type f -exec sed -i 's/target="_parent"//g' {} +

find . -name *right.html  -type f -exec sed -i 's/target="_parent"//g' {} +
99. Cheat Sheet
Description
Notes:
code
#!/bin/bash
revert
## SHORTCUTS and HISTORY


CTRL+A  # move to beginning of line
CTRL+B  # moves backward one character
CTRL+C  # halts the current command
CTRL+D  # deletes one character backward or logs out of current session, similar to exit
CTRL+E  # moves to end of line
CTRL+F  # moves forward one character
CTRL+G  # aborts the current editing command and ring the terminal bell
CTRL+H  # deletes one character under cursor (same as DELETE)
CTRL+J  # same as RETURN
CTRL+K  # deletes (kill) forward to end of line
CTRL+L  # clears screen and redisplay the line
CTRL+M  # same as RETURN
CTRL+N  # next line in command history
CTRL+O  # same as RETURN, then displays next line in history file
CTRL+P  # previous line in command history
CTRL+Q  # resumes suspended shell output
CTRL+R  # searches backward
CTRL+S  # searches forward or suspends shell output
CTRL+T  # transposes two characters
CTRL+U  # kills backward from point to the beginning of line
CTRL+V  # makes the next character typed verbatim
CTRL+W  # kills the word behind the cursor
CTRL+X  # lists the possible filename completions of the current word
CTRL+Y  # retrieves (yank) last item killed
CTRL+Z  # stops the current command, resume with fg in the foreground or bg in the background

ALT+B   # moves backward one word
ALT+D   # deletes next word
ALT+F   # moves forward one word
ALT+H   # deletes one character backward
ALT+T   # transposes two words
ALT+.   # pastes last word from the last command. Pressing it repeatedly traverses through command history.
ALT+U   # capitalizes every character from the current cursor position to the end of the word
ALT+L   # uncapitalizes every character from the current cursor position to the end of the word
ALT+C   # capitalizes the letter under the cursor. The cursor then moves to the end of the word.
ALT+R   # reverts any changes to a command you've pulled from your history if you've edited it.
ALT+?   # list possible completions to what is typed
ALT+^   # expand line to most recent match from history

CTRL+X then (   # start recording a keyboard macro
CTRL+X then )   # finish recording keyboard macro
CTRL+X then E   # recall last recorded keyboard macro
CTRL+X then CTRL+E   # invoke text editor (specified by $EDITOR) on current command line then execute resultes as shell commands

BACKSPACE  # deletes one character backward
DELETE     # deletes one character under cursor

history   # shows command line history
!!        # repeats the last command
!<n>      # refers to command line 'n'
!<string> # refers to command starting with 'string'

exit      # logs out of current session


## BASH BASICS


env                 # displays all environment variables

echo $SHELL         # displays the shell you're using
echo $BASH_VERSION  # displays bash version

bash                # if you want to use bash (type exit to go back to your previously opened shell)
whereis bash        # locates the binary, source and manual-page for a command
which bash          # finds out which program is executed as 'bash' (default: /bin/bash, can change across environments)

clear               # clears content on window (hide displayed lines)


## FILE COMMANDS


ls                            # lists your files in current directory, ls <dir> to print files in a specific directory
ls -l                         # lists your files in 'long format', which contains the exact size of the file, who owns the file and who has the right to look at it, and when it was last modified
ls -a                         # lists all files in 'long format', including hidden files (name beginning with '.')
ln -s <filename> <link>       # creates symbolic link to file
readlink <filename>           # shows where a symbolic links points to
tree                          # show directories and subdirectories in easilly readable file tree
mc                            # terminal file explorer (alternative to ncdu)
touch <filename>              # creates or updates (edit) your file
mktemp -t <filename>            # make a temp file in /tmp/ which is deleted at next boot (-d to make directory)
cat <filename>                # prints file raw content (will not be interpreted)
any_command > <filename>      # '>' is used to perform redirections, it will set any_command's stdout to file instead of "real stdout" (generally /dev/stdout)
more <filename>               # shows the first part of a file (move with space and type q to quit)
head <filename>               # outputs the first lines of file (default: 10 lines)
tail <filename>               # outputs the last lines of file (useful with -f option) (default: 10 lines)
vim <filename>                # opens a file in VIM (VI iMproved) text editor, will create it if it doesn't exist
mv <filename1> <dest>         # moves a file to destination, behavior will change based on 'dest' type (dir: file is placed into dir; file: file will replace dest (tip: useful for renaming))
cp <filename1> <dest>         # copies a file
rm <filename>                 # removes a file
find . -name <name> <type>    # searches for a file or a directory in the current directory and all its sub-directories by its name
diff <filename1> <filename2>  # compares files, and shows where they differ
wc <filename>                 # tells you how many lines, words and characters there are in a file. Use -lwc (lines, word, character) to ouput only 1 of those informations
sort <filename>               # sorts the contents of a text file line by line in alphabetical order, use -n for numeric sort and -r for reversing order.
sort -t -k <filename>         # sorts the contents on specific sort key field starting from 1, using the field separator t.
rev                           # reverse string characters (hello becomes olleh)
chmod -options <filename>     # lets you change the read, write, and execute permissions on your files (more infos: SUID, GUID)
gzip <filename>               # compresses files using gzip algorithm
gunzip <filename>             # uncompresses files compressed by gzip
gzcat <filename>              # lets you look at gzipped file without actually having to gunzip it
lpr <filename>                # prints the file
lpq                           # checks out the printer queue
lprm <jobnumber>              # removes something from the printer queue
genscript                     # converts plain text files into postscript for printing and gives you some options for formatting
dvips <filename>              # prints .dvi files (i.e. files produced by LaTeX)
grep <pattern> <filenames>    # looks for the string in the files
grep -r <pattern> <dir>       # search recursively for pattern in directory
head -n file_name | tail +n   # Print nth line from file.
head -y lines.txt | tail +x   # want to display all the lines from x to y. This includes the xth and yth lines.


## DIRECTORY COMMANDS


mkdir <dirname>               # makes a new directory
rmdir <dirname>               # remove an empty directory
rmdir -rf <dirname>           # remove a non-empty directory
mv <dir1> <dir2>              # rename a directory from <dir1> to <dir2>
cd                            # changes to home
cd ..                         # changes to the parent directory
cd <dirname>                  # changes directory
cp -r <dir1> <dir2>           # copy <dir1> into <dir2> including sub-directories
pwd                           # tells you where you currently are
cd ~                          # changes to home.
cd -                        # changes to previous working directory


## SSH, SYSTEM INFO & NETWORK COMMANDS


ssh user@host            # connects to host as user
ssh -p <port> user@host  # connects to host on specified port as user
ssh-copy-id user@host    # adds your ssh key to host for user to enable a keyed or passwordless login

whoami                   # returns your username
passwd                   # lets you change your password
quota -v                 # shows what your disk quota is
date                     # shows the current date and time
cal                      # shows the month's calendar
uptime                   # shows current uptime
w                        # displays whois online
finger <user>            # displays information about user
uname -a                 # shows kernel information
man <command>            # shows the manual for specified command
df                       # shows disk usage
du <filename>            # shows the disk usage of the files and directories in filename (du -s give only a total)
last <yourUsername>      # lists your last logins
ps -u yourusername       # lists your processes
kill <PID>               # kills the processes with the ID you gave
killall <processname>    # kill all processes with the name
top                      # displays your currently active processes
lsof                     # lists open files
bg                       # lists stopped or background jobs ; resume a stopped job in the background
fg                       # brings the most recent job in the foreground
fg <job>                 # brings job to the foreground

ping <host>              # pings host and outputs results
whois <domain>           # gets whois information for domain
dig <domain>             # gets DNS information for domain
dig -x <host>            # reverses lookup host
wget <file>              # downloads file

time <command>             # report time consumed by command execution


## VARIABLES


varname=value                # defines a variable
varname=value command        # defines a variable to be in the environment of a particular subprocess
echo $varname                # checks a variable's value
echo $$                      # prints process ID of the current shell
echo $!                      # prints process ID of the most recently invoked background job
echo $?                      # displays the exit status of the last command
read <varname>               # reads a string from the input and assigns it to a variable
read -p "prompt" <varname>   # same as above but outputs a prompt to ask user for value
column -t <filename>         # display info in pretty columns (often used with pipe)
let <varname> = <equation>   # performs mathematical calculation using operators like +, -, *, /, %
export VARNAME=value         # defines an environment variable (will be available in subprocesses)

array[0]=valA                # how to define an array
array[1]=valB
array[2]=valC
array=([2]=valC [0]=valA [1]=valB)  # another way
array=(valA valB valC)              # and another

${array[i]}                  # displays array's value for this index. If no index is supplied, array element 0 is assumed
${#array[i]}                 # to find out the length of any element in the array
${#array[@]}                 # to find out how many values there are in the array

declare -a                   # the variables are treated as arrays
declare -f                   # uses function names only
declare -F                   # displays function names without definitions
declare -i                   # the variables are treated as integers
declare -r                   # makes the variables read-only
declare -x                   # marks the variables for export via the environment

${varname:-word}             # if varname exists and isn't null, return its value; otherwise return word
${varname:word}              # if varname exists and isn't null, return its value; otherwise return word
${varname:=word}             # if varname exists and isn't null, return its value; otherwise set it word and then return its value
${varname:?message}          # if varname exists and isn't null, return its value; otherwise print varname, followed by message and abort the current command or script
${varname:+word}             # if varname exists and isn't null, return word; otherwise return null
${varname:offset:length}     # performs substring expansion. It returns the substring of $varname starting at offset and up to length characters

${variable#pattern}          # if the pattern matches the beginning of the variable's value, delete the shortest part that matches and return the rest
${variable##pattern}         # if the pattern matches the beginning of the variable's value, delete the longest part that matches and return the rest
${variable%pattern}          # if the pattern matches the end of the variable's value, delete the shortest part that matches and return the rest
${variable%%pattern}         # if the pattern matches the end of the variable's value, delete the longest part that matches and return the rest
${variable/pattern/string}   # the longest match to pattern in variable is replaced by string. Only the first match is replaced
${variable//pattern/string}  # the longest match to pattern in variable is replaced by string. All matches are replaced

${#varname}                  # returns the length of the value of the variable as a character string

*(patternlist)               # matches zero or more occurrences of the given patterns
+(patternlist)               # matches one or more occurrences of the given patterns
?(patternlist)               # matches zero or one occurrence of the given patterns
@(patternlist)               # matches exactly one of the given patterns
!(patternlist)               # matches anything except one of the given patterns

$(UNIX command)              # command substitution: runs the command and returns standard output


## FUNCTIONS


## The function refers to passed arguments by position (as if they were positional parameters), that is, $1, $2, and so forth.
## $@ is equal to "$1" "$2"... "$N", where N is the number of positional parameters. $# holds the number of positional parameters.

function functname() {
  shell commands
}

unset -f functname  # deletes a function definition
declare -f          # displays all defined functions in your login session


## FLOW CONTROLS


statement1 && statement2  # and operator
statement1 || statement2  # or operator

-a                        # and operator inside a test conditional expression
-o                        # or operator inside a test conditional expression

## STRINGS

str1 == str2               # str1 matches str2
str1 != str2               # str1 does not match str2
str1 < str2                # str1 is less than str2 (alphabetically)
str1 > str2                # str1 is greater than str2 (alphabetically)
str1 \> str2               # str1 is sorted after str2
str1 \< str2               # str1 is sorted before str2
-n str1                    # str1 is not null (has length greater than 0)
-z str1                    # str1 is null (has length 0)

## FILES

-a file                   # file exists or its compilation is successful
-d file                   # file exists and is a directory
-e file                   # file exists; same -a
-f file                   # file exists and is a regular file (i.e., not a directory or other special type of file)
-r file                   # you have read permission
-s file                   # file exists and is not empty
-w file                   # your have write permission
-x file                   # you have execute permission on file, or directory search permission if it is a directory
-N file                   # file was modified since it was last read
-O file                   # you own file
-G file                   # file's group ID matches yours (or one of yours, if you are in multiple groups)
file1 -nt file2           # file1 is newer than file2
file1 -ot file2           # file1 is older than file2

## NUMBERS

-lt                       # less than
-le                       # less than or equal
-eq                       # equal
-ge                       # greater than or equal
-gt                       # greater than
-ne                       # not equal

if condition
then
  statements
[elif condition
  then statements...]
[else
  statements]
fi

for x in {1..10}
do
  statements
done

for name [in list]
do
  statements that can use $name
done

for (( initialisation ; ending condition ; update ))
do
  statements...
done

case expression in
  pattern1 )
    statements ;;
  pattern2 )
    statements ;;
esac

select name [in list]
do
  statements that can use $name
done

while condition; do
  statements
done

until condition; do
  statements
done


## COMMAND-LINE PROCESSING CYCLE


## The default order for command lookup is functions, followed by built-ins, with scripts and executables last.
## There are three built-ins that you can use to override this order: `command`, `builtin` and `enable`.

command  # removes alias and function lookup. Only built-ins and commands found in the search path are executed
builtin  # looks up only built-in commands, ignoring functions and commands found in PATH
enable   # enables and disables shell built-ins

eval     # takes arguments and run them through the command-line processing steps all over again


## INPUT/OUTPUT REDIRECTORS


cmd1|cmd2  # pipe; takes standard output of cmd1 as standard input to cmd2
< file     # takes standard input from file
> file     # directs standard output to file
>> file    # directs standard output to file; append to file if it already exists
>|file     # forces standard output to file even if noclobber is set
n>|file    # forces output to file from file descriptor n even if noclobber is set
<> file    # uses file as both standard input and standard output
n<>file    # uses file as both input and output for file descriptor n
n>file     # directs file descriptor n to file
n<file     # takes file descriptor n from file
n>>file    # directs file description n to file; append to file if it already exists
n>&        # duplicates standard output to file descriptor n
n<&        # duplicates standard input from file descriptor n
n>&m       # file descriptor n is made to be a copy of the output file descriptor
n<&m       # file descriptor n is made to be a copy of the input file descriptor
&>file     # directs standard output and standard error to file
<&-      # closes the standard input
>&-      # closes the standard output
n>&-     # closes the ouput from file descriptor n
n<&-     # closes the input from file descripor n

|tee <file># output command to both terminal and a file (-a to append to file)


## PROCESS HANDLING


## To suspend a job, type CTRL+Z while it is running. You can also suspend a job with CTRL+Y.
## This is slightly different from CTRL+Z in that the process is only stopped when it attempts to read input from terminal.
## Of course, to interrupt a job, type CTRL+C.

myCommand &  # runs job in the background and prompts back the shell

jobs         # lists all jobs (use with -l to see associated PID)

fg           # brings a background job into the foreground
fg %+        # brings most recently invoked background job
fg %-      # brings second most recently invoked background job
fg %N        # brings job number N
fg %string   # brings job whose command begins with string
fg %?string  # brings job whose command contains string

kill -l               # returns a list of all signals on the system, by name and number
kill PID              # terminates process with specified PID
kill -s SIGKILL 4500  # sends a signal to force or terminate the process
kill -15 913          # Ending PID 913 process with signal 15 (TERM)
kill %1               # Where %1 is the number of job as read from 'jobs' command.

ps           # prints a line of information about the current running login shell and any processes running under it
ps -a        # selects all processes with a tty except session leaders

trap cmd sig1 sig2  # executes a command when a signal is received by the script
trap "" sig1 sig2   # ignores that signals
trap - sig1 sig2    # resets the action taken when the signal is received to the default

disown <PID|JID>    # removes the process from the list of jobs

wait                # waits until all background jobs have finished
sleep <number>      # wait # of seconds before continuing

pv                  # display progress bar for data handling commands. often used with pipe like |pv
yes                 # give yes response everytime an input is requested from script/process


## TIPS & TRICKS


## set an alias
cd; nano .bash_profile
> alias gentlenode='ssh [email protected] -p 3404'  # add your alias in .bash_profile

## to quickly go to a specific directory
cd; nano .bashrc
> shopt -s cdable_vars
> export websites="/Users/mac/Documents/websites"

source .bashrc
cd $websites


## DEBUGGING SHELL PROGRAMS


bash -n scriptname  # don't run commands; check for syntax errors only
set -o noexec       # alternative (set option in script)

bash -v scriptname  # echo commands before running them
set -o verbose      # alternative (set option in script)

bash -x scriptname  # echo commands after command-line processing
set -o xtrace       # alternative (set option in script)

trap 'echo $varname' EXIT  # useful when you want to print out the values of variables at the point that your script exits

function errtrap {
  es=$?
  echo "ERROR line $1: Command exited with status $es."
}

trap 'errtrap $LINENO' ERR  # is run whenever a command in the surrounding script or function exits with non-zero status

function dbgtrap {
  echo "badvar is $badvar"
}

trap dbgtrap DEBUG  # causes the trap code to be executed before every statement in a function or script
## ...section of code in which the problem occurs...
trap - DEBUG  # turn off the DEBUG trap

function returntrap {
  echo "A return occurred"
}

trap returntrap RETURN  # is executed each time a shell function or a script executed with the . or source commands finishes executing


## COLORS AND BACKGROUNDS

## note: \e or \x1B also work instead of \033
## Reset
Color_Off='\033[0m' # Text Reset

## Regular Colors
Black='\033[0;30m'  # Black
Red='\033[0;31m'    # Red
Green='\033[0;32m'  # Green
Yellow='\033[0;33m' # Yellow
Blue='\033[0;34m'   # Blue
Purple='\033[0;35m' # Purple
Cyan='\033[0;36m'   # Cyan
White='\033[0;97m'  # White

## Additional colors
LGrey='\033[0;37m'  # Ligth Gray
DGrey='\033[0;90m'  # Dark Gray
LRed='\033[0;91m'   # Ligth Red
LGreen='\033[0;92m' # Ligth Green
LYellow='\033[0;93m'# Ligth Yellow
LBlue='\033[0;94m'  # Ligth Blue
LPurple='\033[0;95m'# Light Purple
LCyan='\033[0;96m'  # Ligth Cyan

## Bold
BBlack='\033[1;30m' # Black
BRed='\033[1;31m'   # Red
BGreen='\033[1;32m' # Green
BYellow='\033[1;33m'# Yellow
BBlue='\033[1;34m'  # Blue
BPurple='\033[1;35m'# Purple
BCyan='\033[1;36m'  # Cyan
BWhite='\033[1;37m' # White

## Underline
UBlack='\033[4;30m' # Black
URed='\033[4;31m'   # Red
UGreen='\033[4;32m' # Green
UYellow='\033[4;33m'# Yellow
UBlue='\033[4;34m'  # Blue
UPurple='\033[4;35m'# Purple
UCyan='\033[4;36m'  # Cyan
UWhite='\033[4;37m' # White

## Background
On_Black='\033[40m' # Black
On_Red='\033[41m'   # Red
On_Green='\033[42m' # Green
On_Yellow='\033[43m'# Yellow
On_Blue='\033[44m'  # Blue
On_Purple='\033[45m'# Purple
On_Cyan='\033[46m'  # Cyan
On_White='\033[47m' # White

## Example of usage
echo -e "${Green}This is GREEN text${Color_Off} and normal text"
echo -e "${Red}${On_White}This is Red test on White background${Color_Off}"
## option -e is mandatory, it enable interpretation of backslash escapes
printf "${Red} This is red \n"
Find
To find files by case-insensitive extension (ex: .jpg, .JPG, .jpG)
find . -iname "*.jpg"
To find directories
find . -type d
To find files
find . -type f
To find files by octal permission
find . -type f -perm 777
To find files with setuid bit set
find . -xdev ( -perm -4000 ) -type f -print0 | xargs -0 ls -l
To find files with extension '.txt' and remove them
find ./path/ -name '*.txt' -exec rm '{}' \;
To find files with extension '.txt' and look for a string into them
find ./path/ -name '*.txt' | xargs grep 'string'
To find files with size bigger than 5 Mebibyte and sort them by size
find . -size +5M -type f -print0 | xargs -0 ls -Ssh | sort -z
To find files bigger than 2 Megabyte and list them
find . -type f -size +200000000c -exec ls -lh {} \; | awk '{ print $9 ": " $5 }'
To find files modified more than 7 days ago and list file information
find . -type f -mtime +7d -ls
To find symlinks owned by a user and list file information
find . -type l -user -ls
To search for and delete empty directories
find . -type d -empty -exec rmdir {} \;
To search for directories named build at a max depth of 2 directories
find . -maxdepth 2 -name build -type d
To search all files who are not in .git directory
find . ! -iwholename '.git' -type f
To find all files that have the same node (hard link) as MY_FILE_HERE
find . -type f -samefile MY_FILE_HERE 2>/dev/null
To find all files in the current directory and modify their permissions
The _.get() method in Lodash retrieves the object’s value at a specific path.
If the value is not present at the object’s specific path, it will be resolved as undefined. This method will return the default value if specified in such a case.
Syntax
_.get(object, path, defaultValue);
Parameters
This method accepts the following parameters:
object: The object in which the given path will be queried.
path: The path used to retrieve the value from the object.
defaultValue: The default value that will be returned for resolved values that are undefined.
Return value
This method will return the value at the specified path if found. Otherwise, it will return the default value if specified.
Example
Let’s look at an example of the _.get() method in the code snippet below:
Explanation
In the HTML tab:
Line 5: We import the lodash script.
In the JavaScript tab:
Lines 2 to 15: We create an object to perform a query.
Line 18: We define a variable collegeYopPath to get the value.
Lines 19: We use the _.get() method and pass the object, collegeYopPath, and a default value as parameters.
Line 22: We define a variable falsyPath to get the value.
Lines 23: We use the _.get() method and pass the object, falsyPath and a default value as parameters.
Output
The _.get() method at line 19 contains a valid path, and therefore the expression is resolved, and 2021 is printed on the console.
The _.get() method at Line 23 contains an invalid path, and therefore the expression is resolved as undefined.
Completing the above step means that you've "sourced" the Markdown files from the filesystem. You can now "transform" the Markdown to HTML and the YAML frontmatter to JSON.
You'll use the plugin gatsby-transformer-remark to recognize files which are Markdown and read their content. The plugin will convert the frontmatter metadata part of your Markdown files as frontmatter and the content part as HTML.
Add this to gatsby-config.js after the previously added gatsby-source-filesystem.
SOURCECODE
Overview
The _.get() method in Lodash retrieves the object’s value at a specific path.
If the value is not present at the object’s specific path, it will be resolved as undefined. This method will return the default value if specified in such a case.
Syntax
_.get(object, path, defaultValue);
Parameters
This method accepts the following parameters:
object: The object in which the given path will be queried.
path: The path used to retrieve the value from the object.
defaultValue: The default value that will be returned for resolved values that are undefined.
Return value
This method will return the value at the specified path if found. Otherwise, it will return the default value if specified.
Example
Let’s look at an example of the _.get() method in the code snippet below:
Explanation
In the HTML tab:
Line 5: We import the lodash script.
In the JavaScript tab:
Lines 2 to 15: We create an object to perform a query.
Line 18: We define a variable collegeYopPath to get the value.
Lines 19: We use the _.get() method and pass the object, collegeYopPath, and a default value as parameters.
Line 22: We define a variable falsyPath to get the value.
Lines 23: We use the _.get() method and pass the object, falsyPath and a default value as parameters.
Output
The _.get() method at line 19 contains a valid path, and therefore the expression is resolved, and 2021 is printed on the console.
The _.get() method at Line 23 contains an invalid path, and therefore the expression is resolved as undefined.
Get all the pages located under the provided urlPath, not including the
index page. I.e.: All pages having their URLs start with urlPath excluding
the page having its URL equal to urlPath.
Parameters
pagesArray Array of page objects. All pages must have 'url' field.
npm i @stackbit/gatsby-plugin-menus babel-runtime chokidar classnames fs-extra gatsby gatsby-image gatsby-plugin-netlify gatsby-plugin-netlify-cms gatsby-plugin-sass gatsby-plugin-react-helmet gatsby-plugin-typescript  --legacy-peer-deps


git checkout 307a5cd        # check out the commit that you want to reset to
git checkout -b fixy        # create a branch named fixy to do the work
git merge -s ours master    # merge master's history without changing any files
git checkout master         # switch back to master
git merge fixy              # and merge in the fixed branch
git push                    # done, no need to force push!
Basic Web Development Environment Setup (CLICK HERE)
Windows Subsystem for Linux (WSL) and Ubuntu
Test if you have Ubuntu installed by typing "Ubuntu" in the search box in the bottom app bar that reads "Type here to search". If you see a search result that reads "Ubuntu 20.04 LTS" with "App" under it, then you have it installed.
1.  In the application search box in the bottom bar, type "PowerShell" to find the application named "Windows PowerShell"
2.  Right-click on "Windows PowerShell" and choose "Run as administrator" from the popup menu
3.  In the blue PowerShell window, type the following: `Enable-WindowsOptionalFeature -Online -FeatureName Microsoft-Windows-Subsystem-Linux`
4.  Restart your computer
5.  In the application search box in the bottom bar, type "Store" to find the application named "Microsoft Store"
6.  Click "Microsoft Store"
7.  Click the "Search" button in the upper-right corner of the window
8.  Type in "Ubuntu"
9.  Click "Run Linux on Windows (Get the apps)"
10. Click the orange tile labeled **"Ubuntu"** Note that there are 3 versions in the Microsoft Store… you want the one just entitled 'Ubuntu'
11. Click "Install"
12. After it downloads, click "Launch"
13. If you get the option, pin the application to the task bar. Otherwise, right-click on the orange Ubuntu icon in the task bar and choose "Pin to taskbar"
14. When prompted to "Enter new UNIX username", type your first name with no spaces
15. When prompted, enter and retype a password for this UNIX user (it can be the same as your Windows password)
16. Confirm your installation by typing the command `whoami 'as in who-am-i'`followed by Enter at the prompt (it should print your first name)
17. You need to update your packages, so type `sudo apt update` (if prompted for your password, enter it)
18. You need to upgrade your packages, so type `sudo apt upgrade` (if prompted for your password, enter it)
Git
Git comes with Ubuntu, so there's nothing to install. However, you should configure it using the following instructions.
Open an Ubuntu terminal if you don't have one open already.
You need to configure Git, so type git config --global user.name "Your Name" with replacing "Your Name" with your real name.
You need to configure Git, so type git config --global user.email [email protected] with replacing "[email protected]" with your real email.
Note: if you want git to remember your login credentials type:
git config --global credential.helper store
Google Chrome
Test if you have Chrome installed by typing "Chrome" in the search box in the bottom app bar that reads "Type here to search". If you see a search result that reads "Chrome" with "App" under it, then you have it installed. Otherwise, follow these instructions to install Google Chrome.
Node.js
Test if you have Node.js installed by opening an Ubuntu terminal and typing node --version. If it reports "Command 'node' not found", then you need to follow these directions.
In the Ubuntu terminal, type sudo apt update and press Enter
In the Ubuntu terminal, type sudo apt install build-essential and press Enter
In the Ubuntu terminal, type curl -o- https://raw.githubusercontent.com/nvm-sh/nvm/v0.35.2/install.sh | bash and press Enter
In the Ubuntu terminal, type ../.bashrc and press Enter
In the Ubuntu terminal, type nvm install --lts and press Enter
Confirm that node is installed by typing node --version and seeing it print something that is not "Command not found"!
Unzip
You will often have to download a zip file and unzip it. It is easier to do this from the command line. So we need to install a linux unzip utility.
In the Ubuntu terminal type: sudo apt install unzip and press Enter
Mocha.js
Test if you have Mocha.js installed by opening an Ubuntu terminal and typing which mocha. If it prints a path, then you're good. Otherwise, if it prints nothing, install Mocha.js by typing npm install -g mocha.
Python 3
Ubuntu does not come with Python 3. Install it using the command sudo apt install python3. Test it by typing python3 --version and seeing it print a number.
Note about WSL
As of the time of writing of this document, WSL has an issue renaming or deleting files if Visual Studio Code is open. So before doing any linux commands which manipulate files, make sure you close Visual Studio Code before running those commands in the Ubuntu terminal.
```bash
find $dir -type f | sed 's|\(.*/\)[^A-Z]*\([A-Z].*\)|mv \"&\" \"\1\2\"|' | sh

find $dir -type d | sed 's|\(.*/\)[^A-Z]*\([A-Z].*\)|mv \"&\" \"\1\2\"|' | sh

for i in *.html; do mv "$i" "${i%-*}.html"; done

for i in *.*; do mv "$i" "${i%-*}.${i##*.}"; done

---
### Description: combine the contents of every file in the contaning directory.

>Notes: this includes the contents of the file it's self...

###### code:

```js
//APPEND-DIR.js
const fs = require('fs');
let cat = require('child_process')
  .execSync('cat *')
  .toString('UTF-8');
fs.writeFile('output.md', cat, err => {
  if (err) throw err;
});
Description: recursively unzips folders and then deletes the zip file by the same name
Notes:
code
find . -name "*.zip" | while read filename; do unzip -o -d "`dirname "$filename"`" "$filename"; done;

find . -name "*.zip" -type f -print -delete
7. git pull keeping local changes
Description
Notes:
code
git stash
git pull
git stash pop
8. Prettier Code Formatter
Description
Notes:
code
sudo npm i prettier -g

prettier --write .
9. Pandoc
Description
Notes:
code
find ./ -iname "*.md" -type f -exec sh -c 'pandoc --standalone "${0}" -o "${0%.md}.html"' {} \;

find ./ -iname "*.html" -type f -exec sh -c 'pandoc --wrap=none --from html --to markdown_strict "${0}" -o "${0%.html}.md"' {} \;

find ./ -iname "*.docx" -type f -exec sh -c 'pandoc "${0}" -o "${0%.docx}.md"' {} \;
``---
10. Gitpod Installs
Description
Notes:
code
sudo apt install tree
sudo apt install pandoc -y
sudo apt install rename -y
sudo apt install black -y
sudo apt install wget -y
npm i lebab -g
npm i prettier -g
npm i npm-recursive-install -g
black .

prettier --write .
npm-recursive-install
11. Repo Utils Package
Description: my standard repo utis package
Notes:
code
npm i @bgoonz11/repoutils
12. Unix Tree Package Usage
Description
Notes:
code
tree -d -I  'node_modules'

tree  -I  'node_modules'

tree -f  -I  'node_modules' >TREE.md

tree -f -L 2  >README.md

tree -f  -I  'node_modules' >listing-path.md

tree -f  -I  'node_modules' -d >TREE.md

tree -f >README.md
sudo sed -i '/githubusercontent/d' ./*sandbox.md

sudo sed -i '/githubusercontent/d' ./*scrap2.md

sudo sed -i '/github\.com/d' ./*out.md

sudo sed -i '/author/d' ./*
20. Remove duplicate lines from a text file
Description
Notes:
//...syntax of uniq...//
$uniq [OPTION] [INPUT[OUTPUT]]
The syntax of this is quite easy to understand. Here, INPUT refers to the input file in which repeated lines need to be filtered out and if INPUT isn't specified then uniq reads from the standard input. OUTPUT refers to the output file in which you can store the filtered output generated by uniq command and as in case of INPUT if OUTPUT isn't specified then uniq writes to the standard output.
Now, let's understand the use of this with the help of an example. Suppose you have a text file named kt.txt which contains repeated lines that needs to be omitted. This can simply be done with uniq.
Description: Creates an index.html file that contains all the files in the working directory or any of it's sub folders as iframes instead of anchor tags
26. Filter Corrupted Git Repo For Troublesome File
Description
Notes:
code
git filter-branch --index-filter 'git rm -r --cached --ignore-unmatch assets/_index.html' HEAD
27. OVERWRITE LOCAL CHANGES
Description
Important: If you have any local changes, they will be lost. With or without --hard option, any local commits that haven't been pushed will be lost.[*]
If you have any files that are not tracked by Git (e.g. uploaded user content), these files will not be affected.
Notes:
First, run a fetch to update all origin/ refs to latest:
code
git fetch --all
## Backup your current branch:

git branch backup-master
## Then, you have two options:

git reset --hard origin/master
## OR If you are on some other branch:

git reset --hard origin/<branch_name>
## Explanation:
## git fetch downloads the latest from remote without trying to merge or rebase anything.

## Then the git reset resets the master branch to what you just fetched. The --hard option changes all the files in your working tree to match the files in origin/master
git fetch --all
git reset --hard origin/master
28. Remove Submodules
Description: To remove a submodule you need to
Notes:
Delete the relevant section from the .gitmodules file.
Stage the .gitmodules changes git add .gitmodules
Delete the relevant section from .git/config.
Run git rm --cached path_to_submodule (no trailing slash).
Run rm -rf .git/modules/path_to_submodule (no trailing slash).
Commit git commit -m "Removed submodule "
Delete the now untracked submodule files rm -rf path_to_submodule
npm i mediumexporter -g

mediumexporter https://medium.com/codex/fundamental-data-structures-in-javascript-8f9f709c15b4 >ds.md
36. Delete files in violation of a given size range (100MB for git)
Description
Notes:
code
find . -size +75M -a -print -a -exec rm -f {} \;

find . -size +98M -a -print -a -exec rm -f {} \;
37. download all links of given file type
Description
Notes:
code
wget -r -A.pdf https://overapi.com/git
38. Kill all node processes
Description
Notes:
code
killall -s KILL node
39. Remove string from file names recursively
Description: In the example below I am using this command to remove the string "-master" from all file names in the working directory and all of it's sub directories
code
find <mydir> -type f -exec sed -i 's/<string1>/<string2>/g' {} +

find . -type f -exec rename 's/-master//g' {} +
Notes: The same could be done for folder names by changing the -type f flag (for file) to a -type d flag (for directory)
find <mydir> -type d -exec sed -i 's/<string1>/<string2>/g' {} +

find . -type d -exec rename 's/-master//g' {} +
40. Remove spaces from file and folder names recursively
Description: replaces spaces in file and folder names with an _ underscore
Notes: need to run sudo apt install rename to use this command
98 rRmove text target="parent" from files called right.html
Description
Notes:
code
find . -name *right.html  -type f -exec sed -i 's/target="_parent"//g' {} +

find . -name *right.html  -type f -exec sed -i 's/target="_parent"//g' {} +
99. Cheat Sheet
Description
Notes:
code
#!/bin/bash
revert
## SHORTCUTS and HISTORY


CTRL+A  # move to beginning of line
CTRL+B  # moves backward one character
CTRL+C  # halts the current command
CTRL+D  # deletes one character backward or logs out of current session, similar to exit
CTRL+E  # moves to end of line
CTRL+F  # moves forward one character
CTRL+G  # aborts the current editing command and ring the terminal bell
CTRL+H  # deletes one character under cursor (same as DELETE)
CTRL+J  # same as RETURN
CTRL+K  # deletes (kill) forward to end of line
CTRL+L  # clears screen and redisplay the line
CTRL+M  # same as RETURN
CTRL+N  # next line in command history
CTRL+O  # same as RETURN, then displays next line in history file
CTRL+P  # previous line in command history
CTRL+Q  # resumes suspended shell output
CTRL+R  # searches backward
CTRL+S  # searches forward or suspends shell output
CTRL+T  # transposes two characters
CTRL+U  # kills backward from point to the beginning of line
CTRL+V  # makes the next character typed verbatim
CTRL+W  # kills the word behind the cursor
CTRL+X  # lists the possible filename completions of the current word
CTRL+Y  # retrieves (yank) last item killed
CTRL+Z  # stops the current command, resume with fg in the foreground or bg in the background

ALT+B   # moves backward one word
ALT+D   # deletes next word
ALT+F   # moves forward one word
ALT+H   # deletes one character backward
ALT+T   # transposes two words
ALT+.   # pastes last word from the last command. Pressing it repeatedly traverses through command history.
ALT+U   # capitalizes every character from the current cursor position to the end of the word
ALT+L   # uncapitalizes every character from the current cursor position to the end of the word
ALT+C   # capitalizes the letter under the cursor. The cursor then moves to the end of the word.
ALT+R   # reverts any changes to a command you've pulled from your history if you've edited it.
ALT+?   # list possible completions to what is typed
ALT+^   # expand line to most recent match from history

CTRL+X then (   # start recording a keyboard macro
CTRL+X then )   # finish recording keyboard macro
CTRL+X then E   # recall last recorded keyboard macro
CTRL+X then CTRL+E   # invoke text editor (specified by $EDITOR) on current command line then execute resultes as shell commands

BACKSPACE  # deletes one character backward
DELETE     # deletes one character under cursor

history   # shows command line history
!!        # repeats the last command
!<n>      # refers to command line 'n'
!<string> # refers to command starting with 'string'

exit      # logs out of current session


## BASH BASICS


env                 # displays all environment variables

echo $SHELL         # displays the shell you're using
echo $BASH_VERSION  # displays bash version

bash                # if you want to use bash (type exit to go back to your previously opened shell)
whereis bash        # locates the binary, source and manual-page for a command
which bash          # finds out which program is executed as 'bash' (default: /bin/bash, can change across environments)

clear               # clears content on window (hide displayed lines)


## FILE COMMANDS


ls                            # lists your files in current directory, ls <dir> to print files in a specific directory
ls -l                         # lists your files in 'long format', which contains the exact size of the file, who owns the file and who has the right to look at it, and when it was last modified
ls -a                         # lists all files in 'long format', including hidden files (name beginning with '.')
ln -s <filename> <link>       # creates symbolic link to file
readlink <filename>           # shows where a symbolic links points to
tree                          # show directories and subdirectories in easilly readable file tree
mc                            # terminal file explorer (alternative to ncdu)
touch <filename>              # creates or updates (edit) your file
mktemp -t <filename>            # make a temp file in /tmp/ which is deleted at next boot (-d to make directory)
cat <filename>                # prints file raw content (will not be interpreted)
any_command > <filename>      # '>' is used to perform redirections, it will set any_command's stdout to file instead of "real stdout" (generally /dev/stdout)
more <filename>               # shows the first part of a file (move with space and type q to quit)
head <filename>               # outputs the first lines of file (default: 10 lines)
tail <filename>               # outputs the last lines of file (useful with -f option) (default: 10 lines)
vim <filename>                # opens a file in VIM (VI iMproved) text editor, will create it if it doesn't exist
mv <filename1> <dest>         # moves a file to destination, behavior will change based on 'dest' type (dir: file is placed into dir; file: file will replace dest (tip: useful for renaming))
cp <filename1> <dest>         # copies a file
rm <filename>                 # removes a file
find . -name <name> <type>    # searches for a file or a directory in the current directory and all its sub-directories by its name
diff <filename1> <filename2>  # compares files, and shows where they differ
wc <filename>                 # tells you how many lines, words and characters there are in a file. Use -lwc (lines, word, character) to ouput only 1 of those informations
sort <filename>               # sorts the contents of a text file line by line in alphabetical order, use -n for numeric sort and -r for reversing order.
sort -t -k <filename>         # sorts the contents on specific sort key field starting from 1, using the field separator t.
rev                           # reverse string characters (hello becomes olleh)
chmod -options <filename>     # lets you change the read, write, and execute permissions on your files (more infos: SUID, GUID)
gzip <filename>               # compresses files using gzip algorithm
gunzip <filename>             # uncompresses files compressed by gzip
gzcat <filename>              # lets you look at gzipped file without actually having to gunzip it
lpr <filename>                # prints the file
lpq                           # checks out the printer queue
lprm <jobnumber>              # removes something from the printer queue
genscript                     # converts plain text files into postscript for printing and gives you some options for formatting
dvips <filename>              # prints .dvi files (i.e. files produced by LaTeX)
grep <pattern> <filenames>    # looks for the string in the files
grep -r <pattern> <dir>       # search recursively for pattern in directory
head -n file_name | tail +n   # Print nth line from file.
head -y lines.txt | tail +x   # want to display all the lines from x to y. This includes the xth and yth lines.


## DIRECTORY COMMANDS


mkdir <dirname>               # makes a new directory
rmdir <dirname>               # remove an empty directory
rmdir -rf <dirname>           # remove a non-empty directory
mv <dir1> <dir2>              # rename a directory from <dir1> to <dir2>
cd                            # changes to home
cd ..                         # changes to the parent directory
cd <dirname>                  # changes directory
cp -r <dir1> <dir2>           # copy <dir1> into <dir2> including sub-directories
pwd                           # tells you where you currently are
cd ~                          # changes to home.
cd -                        # changes to previous working directory


## SSH, SYSTEM INFO & NETWORK COMMANDS


ssh user@host            # connects to host as user
ssh -p <port> user@host  # connects to host on specified port as user
ssh-copy-id user@host    # adds your ssh key to host for user to enable a keyed or passwordless login

whoami                   # returns your username
passwd                   # lets you change your password
quota -v                 # shows what your disk quota is
date                     # shows the current date and time
cal                      # shows the month's calendar
uptime                   # shows current uptime
w                        # displays whois online
finger <user>            # displays information about user
uname -a                 # shows kernel information
man <command>            # shows the manual for specified command
df                       # shows disk usage
du <filename>            # shows the disk usage of the files and directories in filename (du -s give only a total)
last <yourUsername>      # lists your last logins
ps -u yourusername       # lists your processes
kill <PID>               # kills the processes with the ID you gave
killall <processname>    # kill all processes with the name
top                      # displays your currently active processes
lsof                     # lists open files
bg                       # lists stopped or background jobs ; resume a stopped job in the background
fg                       # brings the most recent job in the foreground
fg <job>                 # brings job to the foreground

ping <host>              # pings host and outputs results
whois <domain>           # gets whois information for domain
dig <domain>             # gets DNS information for domain
dig -x <host>            # reverses lookup host
wget <file>              # downloads file

time <command>             # report time consumed by command execution


## VARIABLES


varname=value                # defines a variable
varname=value command        # defines a variable to be in the environment of a particular subprocess
echo $varname                # checks a variable's value
echo $$                      # prints process ID of the current shell
echo $!                      # prints process ID of the most recently invoked background job
echo $?                      # displays the exit status of the last command
read <varname>               # reads a string from the input and assigns it to a variable
read -p "prompt" <varname>   # same as above but outputs a prompt to ask user for value
column -t <filename>         # display info in pretty columns (often used with pipe)
let <varname> = <equation>   # performs mathematical calculation using operators like +, -, *, /, %
export VARNAME=value         # defines an environment variable (will be available in subprocesses)

array[0]=valA                # how to define an array
array[1]=valB
array[2]=valC
array=([2]=valC [0]=valA [1]=valB)  # another way
array=(valA valB valC)              # and another

${array[i]}                  # displays array's value for this index. If no index is supplied, array element 0 is assumed
${#array[i]}                 # to find out the length of any element in the array
${#array[@]}                 # to find out how many values there are in the array

declare -a                   # the variables are treated as arrays
declare -f                   # uses function names only
declare -F                   # displays function names without definitions
declare -i                   # the variables are treated as integers
declare -r                   # makes the variables read-only
declare -x                   # marks the variables for export via the environment

${varname:-word}             # if varname exists and isn't null, return its value; otherwise return word
${varname:word}              # if varname exists and isn't null, return its value; otherwise return word
${varname:=word}             # if varname exists and isn't null, return its value; otherwise set it word and then return its value
${varname:?message}          # if varname exists and isn't null, return its value; otherwise print varname, followed by message and abort the current command or script
${varname:+word}             # if varname exists and isn't null, return word; otherwise return null
${varname:offset:length}     # performs substring expansion. It returns the substring of $varname starting at offset and up to length characters

${variable#pattern}          # if the pattern matches the beginning of the variable's value, delete the shortest part that matches and return the rest
${variable##pattern}         # if the pattern matches the beginning of the variable's value, delete the longest part that matches and return the rest
${variable%pattern}          # if the pattern matches the end of the variable's value, delete the shortest part that matches and return the rest
${variable%%pattern}         # if the pattern matches the end of the variable's value, delete the longest part that matches and return the rest
${variable/pattern/string}   # the longest match to pattern in variable is replaced by string. Only the first match is replaced
${variable//pattern/string}  # the longest match to pattern in variable is replaced by string. All matches are replaced

${#varname}                  # returns the length of the value of the variable as a character string

*(patternlist)               # matches zero or more occurrences of the given patterns
+(patternlist)               # matches one or more occurrences of the given patterns
?(patternlist)               # matches zero or one occurrence of the given patterns
@(patternlist)               # matches exactly one of the given patterns
!(patternlist)               # matches anything except one of the given patterns

$(UNIX command)              # command substitution: runs the command and returns standard output


## FUNCTIONS


## The function refers to passed arguments by position (as if they were positional parameters), that is, $1, $2, and so forth.
## $@ is equal to "$1" "$2"... "$N", where N is the number of positional parameters. $# holds the number of positional parameters.

function functname() {
  shell commands
}

unset -f functname  # deletes a function definition
declare -f          # displays all defined functions in your login session


## FLOW CONTROLS


statement1 && statement2  # and operator
statement1 || statement2  # or operator

-a                        # and operator inside a test conditional expression
-o                        # or operator inside a test conditional expression

## STRINGS

str1 == str2               # str1 matches str2
str1 != str2               # str1 does not match str2
str1 < str2                # str1 is less than str2 (alphabetically)
str1 > str2                # str1 is greater than str2 (alphabetically)
str1 \> str2               # str1 is sorted after str2
str1 \< str2               # str1 is sorted before str2
-n str1                    # str1 is not null (has length greater than 0)
-z str1                    # str1 is null (has length 0)

## FILES

-a file                   # file exists or its compilation is successful
-d file                   # file exists and is a directory
-e file                   # file exists; same -a
-f file                   # file exists and is a regular file (i.e., not a directory or other special type of file)
-r file                   # you have read permission
-s file                   # file exists and is not empty
-w file                   # your have write permission
-x file                   # you have execute permission on file, or directory search permission if it is a directory
-N file                   # file was modified since it was last read
-O file                   # you own file
-G file                   # file's group ID matches yours (or one of yours, if you are in multiple groups)
file1 -nt file2           # file1 is newer than file2
file1 -ot file2           # file1 is older than file2

## NUMBERS

-lt                       # less than
-le                       # less than or equal
-eq                       # equal
-ge                       # greater than or equal
-gt                       # greater than
-ne                       # not equal

if condition
then
  statements
[elif condition
  then statements...]
[else
  statements]
fi

for x in {1..10}
do
  statements
done

for name [in list]
do
  statements that can use $name
done

for (( initialisation ; ending condition ; update ))
do
  statements...
done

case expression in
  pattern1 )
    statements ;;
  pattern2 )
    statements ;;
esac

select name [in list]
do
  statements that can use $name
done

while condition; do
  statements
done

until condition; do
  statements
done


## COMMAND-LINE PROCESSING CYCLE


## The default order for command lookup is functions, followed by built-ins, with scripts and executables last.
## There are three built-ins that you can use to override this order: `command`, `builtin` and `enable`.

command  # removes alias and function lookup. Only built-ins and commands found in the search path are executed
builtin  # looks up only built-in commands, ignoring functions and commands found in PATH
enable   # enables and disables shell built-ins

eval     # takes arguments and run them through the command-line processing steps all over again


## INPUT/OUTPUT REDIRECTORS


cmd1|cmd2  # pipe; takes standard output of cmd1 as standard input to cmd2
< file     # takes standard input from file
> file     # directs standard output to file
>> file    # directs standard output to file; append to file if it already exists
>|file     # forces standard output to file even if noclobber is set
n>|file    # forces output to file from file descriptor n even if noclobber is set
<> file    # uses file as both standard input and standard output
n<>file    # uses file as both input and output for file descriptor n
n>file     # directs file descriptor n to file
n<file     # takes file descriptor n from file
n>>file    # directs file description n to file; append to file if it already exists
n>&        # duplicates standard output to file descriptor n
n<&        # duplicates standard input from file descriptor n
n>&m       # file descriptor n is made to be a copy of the output file descriptor
n<&m       # file descriptor n is made to be a copy of the input file descriptor
&>file     # directs standard output and standard error to file
<&-      # closes the standard input
>&-      # closes the standard output
n>&-     # closes the ouput from file descriptor n
n<&-     # closes the input from file descripor n

|tee <file># output command to both terminal and a file (-a to append to file)


## PROCESS HANDLING


## To suspend a job, type CTRL+Z while it is running. You can also suspend a job with CTRL+Y.
## This is slightly different from CTRL+Z in that the process is only stopped when it attempts to read input from terminal.
## Of course, to interrupt a job, type CTRL+C.

myCommand &  # runs job in the background and prompts back the shell

jobs         # lists all jobs (use with -l to see associated PID)

fg           # brings a background job into the foreground
fg %+        # brings most recently invoked background job
fg %-      # brings second most recently invoked background job
fg %N        # brings job number N
fg %string   # brings job whose command begins with string
fg %?string  # brings job whose command contains string

kill -l               # returns a list of all signals on the system, by name and number
kill PID              # terminates process with specified PID
kill -s SIGKILL 4500  # sends a signal to force or terminate the process
kill -15 913          # Ending PID 913 process with signal 15 (TERM)
kill %1               # Where %1 is the number of job as read from 'jobs' command.

ps           # prints a line of information about the current running login shell and any processes running under it
ps -a        # selects all processes with a tty except session leaders

trap cmd sig1 sig2  # executes a command when a signal is received by the script
trap "" sig1 sig2   # ignores that signals
trap - sig1 sig2    # resets the action taken when the signal is received to the default

disown <PID|JID>    # removes the process from the list of jobs

wait                # waits until all background jobs have finished
sleep <number>      # wait # of seconds before continuing

pv                  # display progress bar for data handling commands. often used with pipe like |pv
yes                 # give yes response everytime an input is requested from script/process


## TIPS & TRICKS


## set an alias
cd; nano .bash_profile
> alias gentlenode='ssh [email protected] -p 3404'  # add your alias in .bash_profile

## to quickly go to a specific directory
cd; nano .bashrc
> shopt -s cdable_vars
> export websites="/Users/mac/Documents/websites"

source .bashrc
cd $websites


## DEBUGGING SHELL PROGRAMS


bash -n scriptname  # don't run commands; check for syntax errors only
set -o noexec       # alternative (set option in script)

bash -v scriptname  # echo commands before running them
set -o verbose      # alternative (set option in script)

bash -x scriptname  # echo commands after command-line processing
set -o xtrace       # alternative (set option in script)

trap 'echo $varname' EXIT  # useful when you want to print out the values of variables at the point that your script exits

function errtrap {
  es=$?
  echo "ERROR line $1: Command exited with status $es."
}

trap 'errtrap $LINENO' ERR  # is run whenever a command in the surrounding script or function exits with non-zero status

function dbgtrap {
  echo "badvar is $badvar"
}

trap dbgtrap DEBUG  # causes the trap code to be executed before every statement in a function or script
## ...section of code in which the problem occurs...
trap - DEBUG  # turn off the DEBUG trap

function returntrap {
  echo "A return occurred"
}

trap returntrap RETURN  # is executed each time a shell function or a script executed with the . or source commands finishes executing


## COLORS AND BACKGROUNDS

## note: \e or \x1B also work instead of \033
## Reset
Color_Off='\033[0m' # Text Reset

## Regular Colors
Black='\033[0;30m'  # Black
Red='\033[0;31m'    # Red
Green='\033[0;32m'  # Green
Yellow='\033[0;33m' # Yellow
Blue='\033[0;34m'   # Blue
Purple='\033[0;35m' # Purple
Cyan='\033[0;36m'   # Cyan
White='\033[0;97m'  # White

## Additional colors
LGrey='\033[0;37m'  # Ligth Gray
DGrey='\033[0;90m'  # Dark Gray
LRed='\033[0;91m'   # Ligth Red
LGreen='\033[0;92m' # Ligth Green
LYellow='\033[0;93m'# Ligth Yellow
LBlue='\033[0;94m'  # Ligth Blue
LPurple='\033[0;95m'# Light Purple
LCyan='\033[0;96m'  # Ligth Cyan

## Bold
BBlack='\033[1;30m' # Black
BRed='\033[1;31m'   # Red
BGreen='\033[1;32m' # Green
BYellow='\033[1;33m'# Yellow
BBlue='\033[1;34m'  # Blue
BPurple='\033[1;35m'# Purple
BCyan='\033[1;36m'  # Cyan
BWhite='\033[1;37m' # White

## Underline
UBlack='\033[4;30m' # Black
URed='\033[4;31m'   # Red
UGreen='\033[4;32m' # Green
UYellow='\033[4;33m'# Yellow
UBlue='\033[4;34m'  # Blue
UPurple='\033[4;35m'# Purple
UCyan='\033[4;36m'  # Cyan
UWhite='\033[4;37m' # White

## Background
On_Black='\033[40m' # Black
On_Red='\033[41m'   # Red
On_Green='\033[42m' # Green
On_Yellow='\033[43m'# Yellow
On_Blue='\033[44m'  # Blue
On_Purple='\033[45m'# Purple
On_Cyan='\033[46m'  # Cyan
On_White='\033[47m' # White

## Example of usage
echo -e "${Green}This is GREEN text${Color_Off} and normal text"
echo -e "${Red}${On_White}This is Red test on White background${Color_Off}"
## option -e is mandatory, it enable interpretation of backslash escapes
printf "${Red} This is red \n"
Find
To find files by case-insensitive extension (ex: .jpg, .JPG, .jpG)
find . -iname "*.jpg"
To find directories
find . -type d
To find files
find . -type f
To find files by octal permission
find . -type f -perm 777
To find files with setuid bit set
find . -xdev ( -perm -4000 ) -type f -print0 | xargs -0 ls -l
To find files with extension '.txt' and remove them
find ./path/ -name '*.txt' -exec rm '{}' \;
To find files with extension '.txt' and look for a string into them
find ./path/ -name '*.txt' | xargs grep 'string'
To find files with size bigger than 5 Mebibyte and sort them by size
find . -size +5M -type f -print0 | xargs -0 ls -Ssh | sort -z
To find files bigger than 2 Megabyte and list them
find . -type f -size +200000000c -exec ls -lh {} \; | awk '{ print $9 ": " $5 }'
To find files modified more than 7 days ago and list file information
find . -type f -mtime +7d -ls
To find symlinks owned by a user and list file information
find . -type l -user -ls
To search for and delete empty directories
find . -type d -empty -exec rmdir {} \;
To search for directories named build at a max depth of 2 directories
find . -maxdepth 2 -name build -type d
To search all files who are not in .git directory
find . ! -iwholename '.git' -type f
To find all files that have the same node (hard link) as MY_FILE_HERE
find . -type f -samefile MY_FILE_HERE 2>/dev/null
To find all files in the current directory and modify their permissions
Use the Gatsby CLI to create a new site, specifying the default starter.
   # create a new Gatsby site using the default starter
   gatsby new my-default-starter https://github.com/gatsbyjs/gatsby-starter-default
Start developing.
Navigate into your new site's directory and start it up.
   cd my-default-starter/
   gatsby develop
Open the source code and start editing!
Your site is now running at http://localhost:8000!
Note: You'll also see a second link:http://localhost:8000/___graphql. This is a tool you can use to experiment with querying your data. Learn more about using this tool in the Gatsby tutorial.
Open the my-default-starter directory in your code editor of choice and edit src/pages/index.js. Save your changes and the browser will update in real time!
🧐 What's inside?
A quick look at the top-level files and directories you'll see in a Gatsby project.
/node_modules: This directory contains all of the modules of code that your project depends on (npm packages) are automatically installed.
/src: This directory will contain all of the code related to what you will see on the front-end of your site (what you see in the browser) such as your site header or a page template. src is a convention for "source code".
.gitignore: This file tells git which files it should not track / not maintain a version history for.
.prettierrc: This is a configuration file for Prettier. Prettier is a tool to help keep the formatting of your code consistent.
gatsby-browser.js: This file is where Gatsby expects to find any usage of the Gatsby browser APIs (if any). These allow customization/extension of default Gatsby settings affecting the browser.
gatsby-config.js: This is the main configuration file for a Gatsby site. This is where you can specify information about your site (metadata) like the site title and description, which Gatsby plugins you'd like to include, etc. (Check out the config docs for more detail).
gatsby-node.js: This file is where Gatsby expects to find any usage of the Gatsby Node APIs (if any). These allow customization/extension of default Gatsby settings affecting pieces of the site build process.
gatsby-ssr.js: This file is where Gatsby expects to find any usage of the Gatsby server-side rendering APIs (if any). These allow customization of default Gatsby settings affecting server-side rendering.
LICENSE: This Gatsby starter is licensed under the 0BSD license. This means that you can see this file as a placeholder and replace it with your own license.
package-lock.json (See package.json below, first). This is an automatically generated file based on the exact versions of your npm dependencies that were installed for your project. (You won't change this file directly).
package.json: A manifest file for Node.js projects, which includes things like metadata (the project's name, author, etc). This manifest is how npm knows which packages to install for your project.
README.md: A text file containing useful reference information about your project.
🎓 Learning Gatsby
Looking for more guidance? Full documentation for Gatsby lives on the website. Here are some places to start:
For most developers, we recommend starting with our [in-depth tutorial for creating a site with Gatsby](https://www.gatsbyjs.com/tutorial/).** It starts with zero assumptions about your level of ability and walks through every step of the process.
To dive straight into code samples, head [to our documentation](https://www.gatsbyjs.com/docs/).** In particular, check out the Guides, API Reference, and Advanced Tutorials\ sections in the sidebar.
Gatsby With Netlify CMS
This tutorial will use gatsby-personal-starter-blog, a Gatsby starter based on the official gatsby-starter-blog. The differences are that gatsby-personal-starter-blog is configured to run the blog on a subdirectory, /blog, and comes pre-installed with Netlify CMS for content editing. It also adds VS Code highlighting for code blocks.
Set up a Netlify CMS-managed Gatsby site in 5 steps
Step 1
Open your Terminal and run the following command from the Gatsby CLI to create a new Gatsby site using gatsby-personal-starter-blog.
gatsby new [your-project-name] https://github.com/thomaswangio/gatsby-personal-starter-blog
Step 2
Once the Gatsby site is finished installing all the packages and dependencies, you can now go into the directory and run the site locally.
cd [your-project-name]
gatsby develop
Now you can go to http://localhost:8000 to see your new site, but what's extra cool is that Netlify CMS is pre-installed and you can access it at http://localhost:8000/admin
A CMS, or content management system, is useful because you can add content like blog posts from a dashboard on your site, instead of having to add posts manually with Markdown. However, you'll likely want to be able to access the CMS from a deployed website, not just locally. For that, you'll need to deploy to Netlify through GitHub, set up continuous deployment, and do a few configurations. You'll go over this in Step-5.
Step 3
Open the project in your code editor and open static/admin/config.yml. Replace your-username/your-repo-name with your GitHub username and project name. This step is important for managing and deploying the Netlify CMS interface.
Head into gatsby-config.js and you can edit your siteMetadata, add a Google Analytics tracking ID, and your app icon/favicon. Test out the edits for the deployed build by quitting the development server and running gatsby build && gatsby serve.
You'll likely also want to edit the README.md and package.json files to include your own project details.
Step 4
Open github.com and create a new repository, with the same name as your project. Push your new Gatsby site's code to GitHub using the following Terminal commands:
Then, open app.netlify.com and add a "New site from Git". Choose your newly created repo and click on "Deploy site" with the default deployment settings.
Note: if you don't see the correct repo listed, you may need to install or reconfigure the Netlify app on GitHub.
Step 5
To make sure that Netlify CMS has access to your GitHub repo, you need to set up an OAuth application on GitHub. The instructions for that are here: Netlify's Using an Authorization Provider.
For the "Homepage URL" – you can use your Netlify subdomain, [name-of-your-site].netlify.com, or you can use a custom domain. To customize the subdomain, look for the "Edit site name" field under "Domain Management" for your project on the Netlify app. To connect your Netlify site to your custom domain instead, see Netlify’s instructions on custom domains.
Once you've configured an authentication provider then you'll be able to use Netlify CMS at your deployed site to add new posts.
Copy the credentials of your new app listed on GitHub OAuth Apps and install a new auth provider on Netlify using them.
Benefits of Netlify CMS, GitHub, and Netlify Workflow
Congrats! Now that Netlify CMS is successfully configured to your project, every time you add a new post, the content will be stored in your repository and versioned on GitHub because Netlify CMS is Git-based. Also, thanks to Netlify's Continuous Deployment, a new version will be deployed every time you add or edit a post.
You can learn more about Netlify CMS and how to configure it further in the Netlify CMS documentation
Gatsby Project Structure | Gatsby
Excerpt
Inside a Gatsby project, you may see some or all of the following folders and files: Folders /.cache Automatically generated. This folder…
Inside a Gatsby project, you may see some or all of the following folders and files:
/.cacheAutomatically generated. This folder is an internal cache created automatically by Gatsby. The files inside this folder are not meant for modification. Should be added to the .gitignore file if not added already.
/plugins This folder hosts any project-specific ("local") plugins that aren't published as an npm package. Check out the plugin docs for more detail.
/publicAutomatically generated. The output of the build process will be exposed inside this folder. Should be added to the .gitignore file if not added already.
/src This directory will contain all of the code related to what you will see on the frontend of your site (what you see in the browser), like your site header, or a page template. "src" is a convention for "source code".
/api JavaScript and TypeScript files under src/api become functions automatically with paths based on their file name. Check out the functions guide for more detail.
/pages Components under src/pages become pages automatically with paths based on their file name. Check out the pages recipes for more detail.
/templates Contains templates for programmatically creating pages. Check out the templates docs for more detail.
html.js For custom configuration of default .cache/default_html.js. Check out the custom HTML docs for more detail.
/static If you put a file into the static folder, it will not be processed by webpack. Instead it will be copied into the public folder untouched. Check out the assets docs for more detail.
gatsby-browser.js: This file is where Gatsby expects to find any usage of the Gatsby browser APIs (if any). These allow customization/extension of default Gatsby settings affecting the browser.
gatsby-config.js: This is the main configuration file for a Gatsby site. This is where you can specify information about your site (metadata) like the site title and description, which Gatsby plugins you'd like to include, etc. Check out the config docs for more detail.
gatsby-node.js: This file is where Gatsby expects to find any usage of the Gatsby node APIs (if any). These allow customization/extension of default Gatsby settings affecting pieces of the site build process.
gatsby-ssr.js: This file is where Gatsby expects to find any usage of the Gatsby server-side rendering APIs (if any). These allow customization of default Gatsby settings affecting server-side rendering.
The file/folder structure described above reflects Gatsby-specific files and folders. Since Gatsby sites are also React apps, it's common to use standard React code organization patterns such as folders like /components and /utils inside /src. The React docs have more information on a typical React app folder structure.
Layout Components | Gatsby
Excerpt
In this guide, you'll learn Gatsby's approach to layouts, how to create and use layout components, and how to prevent layout components from…
In this guide, you'll learn Gatsby's approach to layouts, how to create and use layout components, and how to prevent layout components from unmounting.
Gatsby does not, by default, automatically apply layouts to pages (there are, however, ways to do so which will be covered in a later section). Instead, Gatsby follows React's compositional model of importing and using components. This makes it possible to create multiple levels of layouts, e.g. a global header and footer, and then on some pages, a sidebar menu. It also makes it possible to pass data between layout and page components.
Layout components are for sections of your site that you want to share across multiple pages. For example, Gatsby sites will commonly have a layout component with a shared header and footer. Other common things to add to layouts are a sidebar and/or navigation menu. On this page for example, the header at the top is part of gatsbyjs.com's layout component.
It is recommended to create your layout components alongside the rest of your components (e.g. into src/components/).
Here is an example of a very basic layout component at src/components/layout.js:
import React from "react"export default function Layout({ children }) { return ( <div style={{ margin: `0 auto`, maxWidth: 650, padding: `0 1rem` }}> {children} </div> )}
How to import and add layout components to pages
If you want to apply a layout to a page, you will need to include the Layout component and wrap your page in it. For example, here is how you would apply your layout to the front page:
import React from "react"import Layout from "../components/layout"export default function Home() { return ( <Layout> <h1> I'm in a layout!</h1> </Layout> );}
Repeat for every page and template that needs this layout.
As mentioned earlier, Gatsby does not, by default, automatically wrap pages in a layout component. The "top level" component is the page itself. As a result, when the "top level" component changes between pages, React will re-render all children. This means that shared components like navigations will unmount and remount. This will break CSS transitions or React state within those shared components.
If you need to set a wrapper component around page components that won't get unmounted on page changes, use the wrapPageElementbrowser API and the SSR equivalent.
Alternatively, you can prevent your layout component from unmounting by using gatsby-plugin-layout, which implements the wrapPageElement APIs for you.
Adding Markdown Pages | Gatsby
Excerpt
Gatsby can use Markdown files to create pages in your site.
You add plugins to read and understand folders with Markdown files and from them…
Gatsby can use Markdown files to create pages in your site. You add plugins to read and understand folders with Markdown files and from them create pages automatically.
Here are the steps Gatsby follows for making this happen.
Read files into Gatsby from the filesystem
Transform Markdown to HTML and frontmatter to data
Add a Markdown file
Create a Collection Route component for the Markdown files
Completing the above step means that you've "sourced" the Markdown files from the filesystem. You can now "transform" the Markdown to HTML and the YAML frontmatter to JSON.
You'll use the plugin gatsby-transformer-remark to recognize files which are Markdown and read their content. The plugin will convert the frontmatter metadata part of your Markdown files as frontmatter and the content part as HTML.
When you create a Markdown file, you can include a set of key/value pairs that can be used to provide additional data relevant to specific pages in the GraphQL data layer. This data is called "frontmatter" and is denoted by the triple dashes at the start and end of the block. This block will be parsed by gatsby-transformer-remark as YAML. You can then query the data through the GraphQL API from your React components.
src/markdown-pages/post-1.md
---slug: "/blog/my-first-post"date: "2019-05-04"title: "My first blog post"---
What is important in this step is the key pair slug. The value that is assigned to the key slug is used in order to navigate to your post.
Create a Collection Route for the Markdown files
Create src/pages/{MarkdownRemark.frontmatter__slug}.js and add the following code:
src/pages/{MarkdownRemark.frontmatter__slug}.js
import React from "react"
import { graphql } from "gatsby"export default function Template({  data, }) {  const { markdownRemark } = data   const { frontmatter, html } = markdownRemark  return (    <div className="blog-post-container">       <div className="blog-post">         <h1> {frontmatter.title}</h1>         <h2> {frontmatter.date}</h2>         <div          className="blog-post-content"          dangerouslySetInnerHTML={{ __html: html }}        />       </div>     </div>   )}export const pageQuery = graphql`  query($id: String!) {    markdownRemark(id: {
 eq: $id }) {      html      frontmatter {        date(formatString: "MMMM DD, YYYY")        slug        title      }    }  }`
Two things are important in the file above:
A GraphQL query is made in the second half of the file to get the Markdown data. Gatsby has automagically given you all the Markdown metadata and HTML in this query's result.
The result of the query is injected by Gatsby into the component as the data prop. props.data.markdownRemark is the property that has all the details of the Markdown file.
Next you could create a page component at src/pages/blog/index.js to serve as a listing page for all your blog posts.
This should get you started on some basic Markdown functionality in your Gatsby site. You can further customize the frontmatter and the component file to get desired effects!
For more information, have a look in the working example using-markdown-pages. You can find it in the Gatsby examples section.
The _.get() method in Lodash retrieves the object’s value at a specific path.
If the value is not present at the object’s specific path, it will be resolved as undefined. This method will return the default value if specified in such a case.
Syntax
_.get(object, path, defaultValue);
Parameters
This method accepts the following parameters:
object: The object in which the given path will be queried.
path: The path used to retrieve the value from the object.
defaultValue: The default value that will be returned for resolved values that are undefined.
Return value
This method will return the value at the specified path if found. Otherwise, it will return the default value if specified.
Example
Let’s look at an example of the _.get() method in the code snippet below:
Explanation
In the HTML tab:
Line 5: We import the lodash script.
In the JavaScript tab:
Lines 2 to 15: We create an object to perform a query.
Line 18: We define a variable collegeYopPath to get the value.
Lines 19: We use the _.get() method and pass the object, collegeYopPath, and a default value as parameters.
Line 22: We define a variable falsyPath to get the value.
Lines 23: We use the _.get() method and pass the object, falsyPath and a default value as parameters.
Output
The _.get() method at line 19 contains a valid path, and therefore the expression is resolved, and 2021 is printed on the console.
The _.get() method at Line 23 contains an invalid path, and therefore the expression is resolved as undefined.
Completing the above step means that you've "sourced" the Markdown files from the filesystem. You can now "transform" the Markdown to HTML and the YAML frontmatter to JSON.
You'll use the plugin gatsby-transformer-remark to recognize files which are Markdown and read their content. The plugin will convert the frontmatter metadata part of your Markdown files as frontmatter and the content part as HTML.
Add this to gatsby-config.js after the previously added gatsby-source-filesystem.
SOURCECODE
Overview
The _.get() method in Lodash retrieves the object’s value at a specific path.
If the value is not present at the object’s specific path, it will be resolved as undefined. This method will return the default value if specified in such a case.
Syntax
_.get(object, path, defaultValue);
Parameters
This method accepts the following parameters:
object: The object in which the given path will be queried.
path: The path used to retrieve the value from the object.
defaultValue: The default value that will be returned for resolved values that are undefined.
Return value
This method will return the value at the specified path if found. Otherwise, it will return the default value if specified.
Example
Let’s look at an example of the _.get() method in the code snippet below:
Explanation
In the HTML tab:
Line 5: We import the lodash script.
In the JavaScript tab:
Lines 2 to 15: We create an object to perform a query.
Line 18: We define a variable collegeYopPath to get the value.
Lines 19: We use the _.get() method and pass the object, collegeYopPath, and a default value as parameters.
Line 22: We define a variable falsyPath to get the value.
Lines 23: We use the _.get() method and pass the object, falsyPath and a default value as parameters.
Output
The _.get() method at line 19 contains a valid path, and therefore the expression is resolved, and 2021 is printed on the console.
The _.get() method at Line 23 contains an invalid path, and therefore the expression is resolved as undefined.
Get all the pages located under the provided urlPath, not including the
index page. I.e.: All pages having their URLs start with urlPath excluding
the page having its URL equal to urlPath.
Parameters
pagesArray Array of page objects. All pages must have 'url' field.
npm i @stackbit/gatsby-plugin-menus babel-runtime chokidar classnames fs-extra gatsby gatsby-image gatsby-plugin-netlify gatsby-plugin-netlify-cms gatsby-plugin-sass gatsby-plugin-react-helmet gatsby-plugin-typescript  --legacy-peer-deps


git checkout 307a5cd        # check out the commit that you want to reset to
git checkout -b fixy        # create a branch named fixy to do the work
git merge -s ours master    # merge master's history without changing any files
git checkout master         # switch back to master
git merge fixy              # and merge in the fixed branch
git push                    # done, no need to force push!
Basic Web Development Environment Setup (CLICK HERE)
Windows Subsystem for Linux (WSL) and Ubuntu
Test if you have Ubuntu installed by typing "Ubuntu" in the search box in the bottom app bar that reads "Type here to search". If you see a search result that reads "Ubuntu 20.04 LTS" with "App" under it, then you have it installed.
1.  In the application search box in the bottom bar, type "PowerShell" to find the application named "Windows PowerShell"
2.  Right-click on "Windows PowerShell" and choose "Run as administrator" from the popup menu
3.  In the blue PowerShell window, type the following: `Enable-WindowsOptionalFeature -Online -FeatureName Microsoft-Windows-Subsystem-Linux`
4.  Restart your computer
5.  In the application search box in the bottom bar, type "Store" to find the application named "Microsoft Store"
6.  Click "Microsoft Store"
7.  Click the "Search" button in the upper-right corner of the window
8.  Type in "Ubuntu"
9.  Click "Run Linux on Windows (Get the apps)"
10. Click the orange tile labeled **"Ubuntu"** Note that there are 3 versions in the Microsoft Store… you want the one just entitled 'Ubuntu'
11. Click "Install"
12. After it downloads, click "Launch"
13. If you get the option, pin the application to the task bar. Otherwise, right-click on the orange Ubuntu icon in the task bar and choose "Pin to taskbar"
14. When prompted to "Enter new UNIX username", type your first name with no spaces
15. When prompted, enter and retype a password for this UNIX user (it can be the same as your Windows password)
16. Confirm your installation by typing the command `whoami 'as in who-am-i'`followed by Enter at the prompt (it should print your first name)
17. You need to update your packages, so type `sudo apt update` (if prompted for your password, enter it)
18. You need to upgrade your packages, so type `sudo apt upgrade` (if prompted for your password, enter it)
Git
Git comes with Ubuntu, so there's nothing to install. However, you should configure it using the following instructions.
Open an Ubuntu terminal if you don't have one open already.
You need to configure Git, so type git config --global user.name "Your Name" with replacing "Your Name" with your real name.
You need to configure Git, so type git config --global user.email [email protected] with replacing "[email protected]" with your real email.
Note: if you want git to remember your login credentials type:
git config --global credential.helper store
Google Chrome
Test if you have Chrome installed by typing "Chrome" in the search box in the bottom app bar that reads "Type here to search". If you see a search result that reads "Chrome" with "App" under it, then you have it installed. Otherwise, follow these instructions to install Google Chrome.
Node.js
Test if you have Node.js installed by opening an Ubuntu terminal and typing node --version. If it reports "Command 'node' not found", then you need to follow these directions.
In the Ubuntu terminal, type sudo apt update and press Enter
In the Ubuntu terminal, type sudo apt install build-essential and press Enter
In the Ubuntu terminal, type curl -o- https://raw.githubusercontent.com/nvm-sh/nvm/v0.35.2/install.sh | bash and press Enter
In the Ubuntu terminal, type ../.bashrc and press Enter
In the Ubuntu terminal, type nvm install --lts and press Enter
Confirm that node is installed by typing node --version and seeing it print something that is not "Command not found"!
Unzip
You will often have to download a zip file and unzip it. It is easier to do this from the command line. So we need to install a linux unzip utility.
In the Ubuntu terminal type: sudo apt install unzip and press Enter
Mocha.js
Test if you have Mocha.js installed by opening an Ubuntu terminal and typing which mocha. If it prints a path, then you're good. Otherwise, if it prints nothing, install Mocha.js by typing npm install -g mocha.
Python 3
Ubuntu does not come with Python 3. Install it using the command sudo apt install python3. Test it by typing python3 --version and seeing it print a number.
Note about WSL
As of the time of writing of this document, WSL has an issue renaming or deleting files if Visual Studio Code is open. So before doing any linux commands which manipulate files, make sure you close Visual Studio Code before running those commands in the Ubuntu terminal.
```bash
find $dir -type f | sed 's|\(.*/\)[^A-Z]*\([A-Z].*\)|mv \"&\" \"\1\2\"|' | sh

find $dir -type d | sed 's|\(.*/\)[^A-Z]*\([A-Z].*\)|mv \"&\" \"\1\2\"|' | sh

for i in *.html; do mv "$i" "${i%-*}.html"; done

for i in *.*; do mv "$i" "${i%-*}.${i##*.}"; done

---
### Description: combine the contents of every file in the contaning directory.

>Notes: this includes the contents of the file it's self...

###### code:

```js
//APPEND-DIR.js
const fs = require('fs');
let cat = require('child_process')
  .execSync('cat *')
  .toString('UTF-8');
fs.writeFile('output.md', cat, err => {
  if (err) throw err;
});
Description: recursively unzips folders and then deletes the zip file by the same name
Notes:
code
find . -name "*.zip" | while read filename; do unzip -o -d "`dirname "$filename"`" "$filename"; done;

find . -name "*.zip" -type f -print -delete
7. git pull keeping local changes
Description
Notes:
code
git stash
git pull
git stash pop
8. Prettier Code Formatter
Description
Notes:
code
sudo npm i prettier -g

prettier --write .
9. Pandoc
Description
Notes:
code
find ./ -iname "*.md" -type f -exec sh -c 'pandoc --standalone "${0}" -o "${0%.md}.html"' {} \;

find ./ -iname "*.html" -type f -exec sh -c 'pandoc --wrap=none --from html --to markdown_strict "${0}" -o "${0%.html}.md"' {} \;

find ./ -iname "*.docx" -type f -exec sh -c 'pandoc "${0}" -o "${0%.docx}.md"' {} \;
``---
10. Gitpod Installs
Description
Notes:
code
sudo apt install tree
sudo apt install pandoc -y
sudo apt install rename -y
sudo apt install black -y
sudo apt install wget -y
npm i lebab -g
npm i prettier -g
npm i npm-recursive-install -g
black .

prettier --write .
npm-recursive-install
11. Repo Utils Package
Description: my standard repo utis package
Notes:
code
npm i @bgoonz11/repoutils
12. Unix Tree Package Usage
Description
Notes:
code
tree -d -I  'node_modules'

tree  -I  'node_modules'

tree -f  -I  'node_modules' >TREE.md

tree -f -L 2  >README.md

tree -f  -I  'node_modules' >listing-path.md

tree -f  -I  'node_modules' -d >TREE.md

tree -f >README.md
sudo sed -i '/githubusercontent/d' ./*sandbox.md

sudo sed -i '/githubusercontent/d' ./*scrap2.md

sudo sed -i '/github\.com/d' ./*out.md

sudo sed -i '/author/d' ./*
20. Remove duplicate lines from a text file
Description
Notes:
//...syntax of uniq...//
$uniq [OPTION] [INPUT[OUTPUT]]
The syntax of this is quite easy to understand. Here, INPUT refers to the input file in which repeated lines need to be filtered out and if INPUT isn't specified then uniq reads from the standard input. OUTPUT refers to the output file in which you can store the filtered output generated by uniq command and as in case of INPUT if OUTPUT isn't specified then uniq writes to the standard output.
Now, let's understand the use of this with the help of an example. Suppose you have a text file named kt.txt which contains repeated lines that needs to be omitted. This can simply be done with uniq.
Description: Creates an index.html file that contains all the files in the working directory or any of it's sub folders as iframes instead of anchor tags
26. Filter Corrupted Git Repo For Troublesome File
Description
Notes:
code
git filter-branch --index-filter 'git rm -r --cached --ignore-unmatch assets/_index.html' HEAD
27. OVERWRITE LOCAL CHANGES
Description
Important: If you have any local changes, they will be lost. With or without --hard option, any local commits that haven't been pushed will be lost.[*]
If you have any files that are not tracked by Git (e.g. uploaded user content), these files will not be affected.
Notes:
First, run a fetch to update all origin/ refs to latest:
code
git fetch --all
## Backup your current branch:

git branch backup-master
## Then, you have two options:

git reset --hard origin/master
## OR If you are on some other branch:

git reset --hard origin/<branch_name>
## Explanation:
## git fetch downloads the latest from remote without trying to merge or rebase anything.

## Then the git reset resets the master branch to what you just fetched. The --hard option changes all the files in your working tree to match the files in origin/master
git fetch --all
git reset --hard origin/master
28. Remove Submodules
Description: To remove a submodule you need to
Notes:
Delete the relevant section from the .gitmodules file.
Stage the .gitmodules changes git add .gitmodules
Delete the relevant section from .git/config.
Run git rm --cached path_to_submodule (no trailing slash).
Run rm -rf .git/modules/path_to_submodule (no trailing slash).
Commit git commit -m "Removed submodule "
Delete the now untracked submodule files rm -rf path_to_submodule
npm i mediumexporter -g

mediumexporter https://medium.com/codex/fundamental-data-structures-in-javascript-8f9f709c15b4 >ds.md
36. Delete files in violation of a given size range (100MB for git)
Description
Notes:
code
find . -size +75M -a -print -a -exec rm -f {} \;

find . -size +98M -a -print -a -exec rm -f {} \;
37. download all links of given file type
Description
Notes:
code
wget -r -A.pdf https://overapi.com/git
38. Kill all node processes
Description
Notes:
code
killall -s KILL node
39. Remove string from file names recursively
Description: In the example below I am using this command to remove the string "-master" from all file names in the working directory and all of it's sub directories
code
find <mydir> -type f -exec sed -i 's/<string1>/<string2>/g' {} +

find . -type f -exec rename 's/-master//g' {} +
Notes: The same could be done for folder names by changing the -type f flag (for file) to a -type d flag (for directory)
find <mydir> -type d -exec sed -i 's/<string1>/<string2>/g' {} +

find . -type d -exec rename 's/-master//g' {} +
40. Remove spaces from file and folder names recursively
Description: replaces spaces in file and folder names with an _ underscore
Notes: need to run sudo apt install rename to use this command
98 rRmove text target="parent" from files called right.html
Description
Notes:
code
find . -name *right.html  -type f -exec sed -i 's/target="_parent"//g' {} +

find . -name *right.html  -type f -exec sed -i 's/target="_parent"//g' {} +
99. Cheat Sheet
Description
Notes:
code
#!/bin/bash
revert
## SHORTCUTS and HISTORY


CTRL+A  # move to beginning of line
CTRL+B  # moves backward one character
CTRL+C  # halts the current command
CTRL+D  # deletes one character backward or logs out of current session, similar to exit
CTRL+E  # moves to end of line
CTRL+F  # moves forward one character
CTRL+G  # aborts the current editing command and ring the terminal bell
CTRL+H  # deletes one character under cursor (same as DELETE)
CTRL+J  # same as RETURN
CTRL+K  # deletes (kill) forward to end of line
CTRL+L  # clears screen and redisplay the line
CTRL+M  # same as RETURN
CTRL+N  # next line in command history
CTRL+O  # same as RETURN, then displays next line in history file
CTRL+P  # previous line in command history
CTRL+Q  # resumes suspended shell output
CTRL+R  # searches backward
CTRL+S  # searches forward or suspends shell output
CTRL+T  # transposes two characters
CTRL+U  # kills backward from point to the beginning of line
CTRL+V  # makes the next character typed verbatim
CTRL+W  # kills the word behind the cursor
CTRL+X  # lists the possible filename completions of the current word
CTRL+Y  # retrieves (yank) last item killed
CTRL+Z  # stops the current command, resume with fg in the foreground or bg in the background

ALT+B   # moves backward one word
ALT+D   # deletes next word
ALT+F   # moves forward one word
ALT+H   # deletes one character backward
ALT+T   # transposes two words
ALT+.   # pastes last word from the last command. Pressing it repeatedly traverses through command history.
ALT+U   # capitalizes every character from the current cursor position to the end of the word
ALT+L   # uncapitalizes every character from the current cursor position to the end of the word
ALT+C   # capitalizes the letter under the cursor. The cursor then moves to the end of the word.
ALT+R   # reverts any changes to a command you've pulled from your history if you've edited it.
ALT+?   # list possible completions to what is typed
ALT+^   # expand line to most recent match from history

CTRL+X then (   # start recording a keyboard macro
CTRL+X then )   # finish recording keyboard macro
CTRL+X then E   # recall last recorded keyboard macro
CTRL+X then CTRL+E   # invoke text editor (specified by $EDITOR) on current command line then execute resultes as shell commands

BACKSPACE  # deletes one character backward
DELETE     # deletes one character under cursor

history   # shows command line history
!!        # repeats the last command
!<n>      # refers to command line 'n'
!<string> # refers to command starting with 'string'

exit      # logs out of current session


## BASH BASICS


env                 # displays all environment variables

echo $SHELL         # displays the shell you're using
echo $BASH_VERSION  # displays bash version

bash                # if you want to use bash (type exit to go back to your previously opened shell)
whereis bash        # locates the binary, source and manual-page for a command
which bash          # finds out which program is executed as 'bash' (default: /bin/bash, can change across environments)

clear               # clears content on window (hide displayed lines)


## FILE COMMANDS


ls                            # lists your files in current directory, ls <dir> to print files in a specific directory
ls -l                         # lists your files in 'long format', which contains the exact size of the file, who owns the file and who has the right to look at it, and when it was last modified
ls -a                         # lists all files in 'long format', including hidden files (name beginning with '.')
ln -s <filename> <link>       # creates symbolic link to file
readlink <filename>           # shows where a symbolic links points to
tree                          # show directories and subdirectories in easilly readable file tree
mc                            # terminal file explorer (alternative to ncdu)
touch <filename>              # creates or updates (edit) your file
mktemp -t <filename>            # make a temp file in /tmp/ which is deleted at next boot (-d to make directory)
cat <filename>                # prints file raw content (will not be interpreted)
any_command > <filename>      # '>' is used to perform redirections, it will set any_command's stdout to file instead of "real stdout" (generally /dev/stdout)
more <filename>               # shows the first part of a file (move with space and type q to quit)
head <filename>               # outputs the first lines of file (default: 10 lines)
tail <filename>               # outputs the last lines of file (useful with -f option) (default: 10 lines)
vim <filename>                # opens a file in VIM (VI iMproved) text editor, will create it if it doesn't exist
mv <filename1> <dest>         # moves a file to destination, behavior will change based on 'dest' type (dir: file is placed into dir; file: file will replace dest (tip: useful for renaming))
cp <filename1> <dest>         # copies a file
rm <filename>                 # removes a file
find . -name <name> <type>    # searches for a file or a directory in the current directory and all its sub-directories by its name
diff <filename1> <filename2>  # compares files, and shows where they differ
wc <filename>                 # tells you how many lines, words and characters there are in a file. Use -lwc (lines, word, character) to ouput only 1 of those informations
sort <filename>               # sorts the contents of a text file line by line in alphabetical order, use -n for numeric sort and -r for reversing order.
sort -t -k <filename>         # sorts the contents on specific sort key field starting from 1, using the field separator t.
rev                           # reverse string characters (hello becomes olleh)
chmod -options <filename>     # lets you change the read, write, and execute permissions on your files (more infos: SUID, GUID)
gzip <filename>               # compresses files using gzip algorithm
gunzip <filename>             # uncompresses files compressed by gzip
gzcat <filename>              # lets you look at gzipped file without actually having to gunzip it
lpr <filename>                # prints the file
lpq                           # checks out the printer queue
lprm <jobnumber>              # removes something from the printer queue
genscript                     # converts plain text files into postscript for printing and gives you some options for formatting
dvips <filename>              # prints .dvi files (i.e. files produced by LaTeX)
grep <pattern> <filenames>    # looks for the string in the files
grep -r <pattern> <dir>       # search recursively for pattern in directory
head -n file_name | tail +n   # Print nth line from file.
head -y lines.txt | tail +x   # want to display all the lines from x to y. This includes the xth and yth lines.


## DIRECTORY COMMANDS


mkdir <dirname>               # makes a new directory
rmdir <dirname>               # remove an empty directory
rmdir -rf <dirname>           # remove a non-empty directory
mv <dir1> <dir2>              # rename a directory from <dir1> to <dir2>
cd                            # changes to home
cd ..                         # changes to the parent directory
cd <dirname>                  # changes directory
cp -r <dir1> <dir2>           # copy <dir1> into <dir2> including sub-directories
pwd                           # tells you where you currently are
cd ~                          # changes to home.
cd -                        # changes to previous working directory


## SSH, SYSTEM INFO & NETWORK COMMANDS


ssh user@host            # connects to host as user
ssh -p <port> user@host  # connects to host on specified port as user
ssh-copy-id user@host    # adds your ssh key to host for user to enable a keyed or passwordless login

whoami                   # returns your username
passwd                   # lets you change your password
quota -v                 # shows what your disk quota is
date                     # shows the current date and time
cal                      # shows the month's calendar
uptime                   # shows current uptime
w                        # displays whois online
finger <user>            # displays information about user
uname -a                 # shows kernel information
man <command>            # shows the manual for specified command
df                       # shows disk usage
du <filename>            # shows the disk usage of the files and directories in filename (du -s give only a total)
last <yourUsername>      # lists your last logins
ps -u yourusername       # lists your processes
kill <PID>               # kills the processes with the ID you gave
killall <processname>    # kill all processes with the name
top                      # displays your currently active processes
lsof                     # lists open files
bg                       # lists stopped or background jobs ; resume a stopped job in the background
fg                       # brings the most recent job in the foreground
fg <job>                 # brings job to the foreground

ping <host>              # pings host and outputs results
whois <domain>           # gets whois information for domain
dig <domain>             # gets DNS information for domain
dig -x <host>            # reverses lookup host
wget <file>              # downloads file

time <command>             # report time consumed by command execution


## VARIABLES


varname=value                # defines a variable
varname=value command        # defines a variable to be in the environment of a particular subprocess
echo $varname                # checks a variable's value
echo $$                      # prints process ID of the current shell
echo $!                      # prints process ID of the most recently invoked background job
echo $?                      # displays the exit status of the last command
read <varname>               # reads a string from the input and assigns it to a variable
read -p "prompt" <varname>   # same as above but outputs a prompt to ask user for value
column -t <filename>         # display info in pretty columns (often used with pipe)
let <varname> = <equation>   # performs mathematical calculation using operators like +, -, *, /, %
export VARNAME=value         # defines an environment variable (will be available in subprocesses)

array[0]=valA                # how to define an array
array[1]=valB
array[2]=valC
array=([2]=valC [0]=valA [1]=valB)  # another way
array=(valA valB valC)              # and another

${array[i]}                  # displays array's value for this index. If no index is supplied, array element 0 is assumed
${#array[i]}                 # to find out the length of any element in the array
${#array[@]}                 # to find out how many values there are in the array

declare -a                   # the variables are treated as arrays
declare -f                   # uses function names only
declare -F                   # displays function names without definitions
declare -i                   # the variables are treated as integers
declare -r                   # makes the variables read-only
declare -x                   # marks the variables for export via the environment

${varname:-word}             # if varname exists and isn't null, return its value; otherwise return word
${varname:word}              # if varname exists and isn't null, return its value; otherwise return word
${varname:=word}             # if varname exists and isn't null, return its value; otherwise set it word and then return its value
${varname:?message}          # if varname exists and isn't null, return its value; otherwise print varname, followed by message and abort the current command or script
${varname:+word}             # if varname exists and isn't null, return word; otherwise return null
${varname:offset:length}     # performs substring expansion. It returns the substring of $varname starting at offset and up to length characters

${variable#pattern}          # if the pattern matches the beginning of the variable's value, delete the shortest part that matches and return the rest
${variable##pattern}         # if the pattern matches the beginning of the variable's value, delete the longest part that matches and return the rest
${variable%pattern}          # if the pattern matches the end of the variable's value, delete the shortest part that matches and return the rest
${variable%%pattern}         # if the pattern matches the end of the variable's value, delete the longest part that matches and return the rest
${variable/pattern/string}   # the longest match to pattern in variable is replaced by string. Only the first match is replaced
${variable//pattern/string}  # the longest match to pattern in variable is replaced by string. All matches are replaced

${#varname}                  # returns the length of the value of the variable as a character string

*(patternlist)               # matches zero or more occurrences of the given patterns
+(patternlist)               # matches one or more occurrences of the given patterns
?(patternlist)               # matches zero or one occurrence of the given patterns
@(patternlist)               # matches exactly one of the given patterns
!(patternlist)               # matches anything except one of the given patterns

$(UNIX command)              # command substitution: runs the command and returns standard output


## FUNCTIONS


## The function refers to passed arguments by position (as if they were positional parameters), that is, $1, $2, and so forth.
## $@ is equal to "$1" "$2"... "$N", where N is the number of positional parameters. $# holds the number of positional parameters.

function functname() {
  shell commands
}

unset -f functname  # deletes a function definition
declare -f          # displays all defined functions in your login session


## FLOW CONTROLS


statement1 && statement2  # and operator
statement1 || statement2  # or operator

-a                        # and operator inside a test conditional expression
-o                        # or operator inside a test conditional expression

## STRINGS

str1 == str2               # str1 matches str2
str1 != str2               # str1 does not match str2
str1 < str2                # str1 is less than str2 (alphabetically)
str1 > str2                # str1 is greater than str2 (alphabetically)
str1 \> str2               # str1 is sorted after str2
str1 \< str2               # str1 is sorted before str2
-n str1                    # str1 is not null (has length greater than 0)
-z str1                    # str1 is null (has length 0)

## FILES

-a file                   # file exists or its compilation is successful
-d file                   # file exists and is a directory
-e file                   # file exists; same -a
-f file                   # file exists and is a regular file (i.e., not a directory or other special type of file)
-r file                   # you have read permission
-s file                   # file exists and is not empty
-w file                   # your have write permission
-x file                   # you have execute permission on file, or directory search permission if it is a directory
-N file                   # file was modified since it was last read
-O file                   # you own file
-G file                   # file's group ID matches yours (or one of yours, if you are in multiple groups)
file1 -nt file2           # file1 is newer than file2
file1 -ot file2           # file1 is older than file2

## NUMBERS

-lt                       # less than
-le                       # less than or equal
-eq                       # equal
-ge                       # greater than or equal
-gt                       # greater than
-ne                       # not equal

if condition
then
  statements
[elif condition
  then statements...]
[else
  statements]
fi

for x in {1..10}
do
  statements
done

for name [in list]
do
  statements that can use $name
done

for (( initialisation ; ending condition ; update ))
do
  statements...
done

case expression in
  pattern1 )
    statements ;;
  pattern2 )
    statements ;;
esac

select name [in list]
do
  statements that can use $name
done

while condition; do
  statements
done

until condition; do
  statements
done


## COMMAND-LINE PROCESSING CYCLE


## The default order for command lookup is functions, followed by built-ins, with scripts and executables last.
## There are three built-ins that you can use to override this order: `command`, `builtin` and `enable`.

command  # removes alias and function lookup. Only built-ins and commands found in the search path are executed
builtin  # looks up only built-in commands, ignoring functions and commands found in PATH
enable   # enables and disables shell built-ins

eval     # takes arguments and run them through the command-line processing steps all over again


## INPUT/OUTPUT REDIRECTORS


cmd1|cmd2  # pipe; takes standard output of cmd1 as standard input to cmd2
< file     # takes standard input from file
> file     # directs standard output to file
>> file    # directs standard output to file; append to file if it already exists
>|file     # forces standard output to file even if noclobber is set
n>|file    # forces output to file from file descriptor n even if noclobber is set
<> file    # uses file as both standard input and standard output
n<>file    # uses file as both input and output for file descriptor n
n>file     # directs file descriptor n to file
n<file     # takes file descriptor n from file
n>>file    # directs file description n to file; append to file if it already exists
n>&        # duplicates standard output to file descriptor n
n<&        # duplicates standard input from file descriptor n
n>&m       # file descriptor n is made to be a copy of the output file descriptor
n<&m       # file descriptor n is made to be a copy of the input file descriptor
&>file     # directs standard output and standard error to file
<&-      # closes the standard input
>&-      # closes the standard output
n>&-     # closes the ouput from file descriptor n
n<&-     # closes the input from file descripor n

|tee <file># output command to both terminal and a file (-a to append to file)


## PROCESS HANDLING


## To suspend a job, type CTRL+Z while it is running. You can also suspend a job with CTRL+Y.
## This is slightly different from CTRL+Z in that the process is only stopped when it attempts to read input from terminal.
## Of course, to interrupt a job, type CTRL+C.

myCommand &  # runs job in the background and prompts back the shell

jobs         # lists all jobs (use with -l to see associated PID)

fg           # brings a background job into the foreground
fg %+        # brings most recently invoked background job
fg %-      # brings second most recently invoked background job
fg %N        # brings job number N
fg %string   # brings job whose command begins with string
fg %?string  # brings job whose command contains string

kill -l               # returns a list of all signals on the system, by name and number
kill PID              # terminates process with specified PID
kill -s SIGKILL 4500  # sends a signal to force or terminate the process
kill -15 913          # Ending PID 913 process with signal 15 (TERM)
kill %1               # Where %1 is the number of job as read from 'jobs' command.

ps           # prints a line of information about the current running login shell and any processes running under it
ps -a        # selects all processes with a tty except session leaders

trap cmd sig1 sig2  # executes a command when a signal is received by the script
trap "" sig1 sig2   # ignores that signals
trap - sig1 sig2    # resets the action taken when the signal is received to the default

disown <PID|JID>    # removes the process from the list of jobs

wait                # waits until all background jobs have finished
sleep <number>      # wait # of seconds before continuing

pv                  # display progress bar for data handling commands. often used with pipe like |pv
yes                 # give yes response everytime an input is requested from script/process


## TIPS & TRICKS


## set an alias
cd; nano .bash_profile
> alias gentlenode='ssh [email protected] -p 3404'  # add your alias in .bash_profile

## to quickly go to a specific directory
cd; nano .bashrc
> shopt -s cdable_vars
> export websites="/Users/mac/Documents/websites"

source .bashrc
cd $websites


## DEBUGGING SHELL PROGRAMS


bash -n scriptname  # don't run commands; check for syntax errors only
set -o noexec       # alternative (set option in script)

bash -v scriptname  # echo commands before running them
set -o verbose      # alternative (set option in script)

bash -x scriptname  # echo commands after command-line processing
set -o xtrace       # alternative (set option in script)

trap 'echo $varname' EXIT  # useful when you want to print out the values of variables at the point that your script exits

function errtrap {
  es=$?
  echo "ERROR line $1: Command exited with status $es."
}

trap 'errtrap $LINENO' ERR  # is run whenever a command in the surrounding script or function exits with non-zero status

function dbgtrap {
  echo "badvar is $badvar"
}

trap dbgtrap DEBUG  # causes the trap code to be executed before every statement in a function or script
## ...section of code in which the problem occurs...
trap - DEBUG  # turn off the DEBUG trap

function returntrap {
  echo "A return occurred"
}

trap returntrap RETURN  # is executed each time a shell function or a script executed with the . or source commands finishes executing


## COLORS AND BACKGROUNDS

## note: \e or \x1B also work instead of \033
## Reset
Color_Off='\033[0m' # Text Reset

## Regular Colors
Black='\033[0;30m'  # Black
Red='\033[0;31m'    # Red
Green='\033[0;32m'  # Green
Yellow='\033[0;33m' # Yellow
Blue='\033[0;34m'   # Blue
Purple='\033[0;35m' # Purple
Cyan='\033[0;36m'   # Cyan
White='\033[0;97m'  # White

## Additional colors
LGrey='\033[0;37m'  # Ligth Gray
DGrey='\033[0;90m'  # Dark Gray
LRed='\033[0;91m'   # Ligth Red
LGreen='\033[0;92m' # Ligth Green
LYellow='\033[0;93m'# Ligth Yellow
LBlue='\033[0;94m'  # Ligth Blue
LPurple='\033[0;95m'# Light Purple
LCyan='\033[0;96m'  # Ligth Cyan

## Bold
BBlack='\033[1;30m' # Black
BRed='\033[1;31m'   # Red
BGreen='\033[1;32m' # Green
BYellow='\033[1;33m'# Yellow
BBlue='\033[1;34m'  # Blue
BPurple='\033[1;35m'# Purple
BCyan='\033[1;36m'  # Cyan
BWhite='\033[1;37m' # White

## Underline
UBlack='\033[4;30m' # Black
URed='\033[4;31m'   # Red
UGreen='\033[4;32m' # Green
UYellow='\033[4;33m'# Yellow
UBlue='\033[4;34m'  # Blue
UPurple='\033[4;35m'# Purple
UCyan='\033[4;36m'  # Cyan
UWhite='\033[4;37m' # White

## Background
On_Black='\033[40m' # Black
On_Red='\033[41m'   # Red
On_Green='\033[42m' # Green
On_Yellow='\033[43m'# Yellow
On_Blue='\033[44m'  # Blue
On_Purple='\033[45m'# Purple
On_Cyan='\033[46m'  # Cyan
On_White='\033[47m' # White

## Example of usage
echo -e "${Green}This is GREEN text${Color_Off} and normal text"
echo -e "${Red}${On_White}This is Red test on White background${Color_Off}"
## option -e is mandatory, it enable interpretation of backslash escapes
printf "${Red} This is red \n"
Find
To find files by case-insensitive extension (ex: .jpg, .JPG, .jpG)
find . -iname "*.jpg"
To find directories
find . -type d
To find files
find . -type f
To find files by octal permission
find . -type f -perm 777
To find files with setuid bit set
find . -xdev ( -perm -4000 ) -type f -print0 | xargs -0 ls -l
To find files with extension '.txt' and remove them
find ./path/ -name '*.txt' -exec rm '{}' \;
To find files with extension '.txt' and look for a string into them
find ./path/ -name '*.txt' | xargs grep 'string'
To find files with size bigger than 5 Mebibyte and sort them by size
find . -size +5M -type f -print0 | xargs -0 ls -Ssh | sort -z
To find files bigger than 2 Megabyte and list them
find . -type f -size +200000000c -exec ls -lh {} \; | awk '{ print $9 ": " $5 }'
To find files modified more than 7 days ago and list file information
find . -type f -mtime +7d -ls
To find symlinks owned by a user and list file information
find . -type l -user -ls
To search for and delete empty directories
find . -type d -empty -exec rmdir {} \;
To search for directories named build at a max depth of 2 directories
find . -maxdepth 2 -name build -type d
To search all files who are not in .git directory
find . ! -iwholename '.git' -type f
To find all files that have the same node (hard link) as MY_FILE_HERE
find . -type f -samefile MY_FILE_HERE 2>/dev/null
To find all files in the current directory and modify their permissions
The _.get() method in Lodash retrieves the object’s value at a specific path.
If the value is not present at the object’s specific path, it will be resolved as undefined. This method will return the default value if specified in such a case.
Syntax
_.get(object, path, defaultValue);
Parameters
This method accepts the following parameters:
object: The object in which the given path will be queried.
path: The path used to retrieve the value from the object.
defaultValue: The default value that will be returned for resolved values that are undefined.
Return value
This method will return the value at the specified path if found. Otherwise, it will return the default value if specified.
Example
Let’s look at an example of the _.get() method in the code snippet below:
Explanation
In the HTML tab:
Line 5: We import the lodash script.
In the JavaScript tab:
Lines 2 to 15: We create an object to perform a query.
Line 18: We define a variable collegeYopPath to get the value.
Lines 19: We use the _.get() method and pass the object, collegeYopPath, and a default value as parameters.
Line 22: We define a variable falsyPath to get the value.
Lines 23: We use the _.get() method and pass the object, falsyPath and a default value as parameters.
Output
The _.get() method at line 19 contains a valid path, and therefore the expression is resolved, and 2021 is printed on the console.
The _.get() method at Line 23 contains an invalid path, and therefore the expression is resolved as undefined.
Completing the above step means that you've "sourced" the Markdown files from the filesystem. You can now "transform" the Markdown to HTML and the YAML frontmatter to JSON.
You'll use the plugin gatsby-transformer-remark to recognize files which are Markdown and read their content. The plugin will convert the frontmatter metadata part of your Markdown files as frontmatter and the content part as HTML.
Add this to gatsby-config.js after the previously added gatsby-source-filesystem.
SOURCECODE
Overview
The _.get() method in Lodash retrieves the object’s value at a specific path.
If the value is not present at the object’s specific path, it will be resolved as undefined. This method will return the default value if specified in such a case.
Syntax
_.get(object, path, defaultValue);
Parameters
This method accepts the following parameters:
object: The object in which the given path will be queried.
path: The path used to retrieve the value from the object.
defaultValue: The default value that will be returned for resolved values that are undefined.
Return value
This method will return the value at the specified path if found. Otherwise, it will return the default value if specified.
Example
Let’s look at an example of the _.get() method in the code snippet below:
Explanation
In the HTML tab:
Line 5: We import the lodash script.
In the JavaScript tab:
Lines 2 to 15: We create an object to perform a query.
Line 18: We define a variable collegeYopPath to get the value.
Lines 19: We use the _.get() method and pass the object, collegeYopPath, and a default value as parameters.
Line 22: We define a variable falsyPath to get the value.
Lines 23: We use the _.get() method and pass the object, falsyPath and a default value as parameters.
Output
The _.get() method at line 19 contains a valid path, and therefore the expression is resolved, and 2021 is printed on the console.
The _.get() method at Line 23 contains an invalid path, and therefore the expression is resolved as undefined.
Get all the pages located under the provided urlPath, not including the
index page. I.e.: All pages having their URLs start with urlPath excluding
the page having its URL equal to urlPath.
Parameters
pagesArray Array of page objects. All pages must have 'url' field.


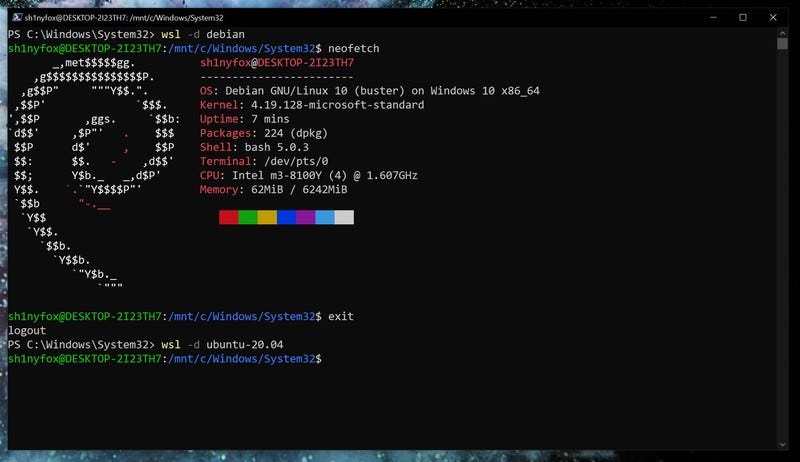
 algolia / algoliasearch-client-javascript@algolia/client-search
 @algolia/requester-common
 stackbit / gatsby-plugin-menus@stackbit/gatsby-plugin-menus
 facebook / jestbabel-jest
 gatsbyjs / gatsbybabel-preset-gatsby
 keyz / identity-obj-proxy
  lodash / lodash
  getkirby-v2 / algolia-pluginalgolia
 ecomfe / babel-runtime
  paulmillr / chokidar
  DefinitelyTyped / DefinitelyTyped@types/node
 micromatch / anymatch
  chaijs / chai
  microsoft / dtslint
  eslint / eslint
  fsevents / fsevents
  gulpjs / glob-parent
  sindresorhus / is-binary-path
  mochajs / mocha
  jonschlinkert / normalize-path
  istanbuljs / nyc
  isaacs / rimraf
  sinonjs / sinon
  domenic / sinon-chai
  anodynos / upath
  JedWatson / classnames
  bestiejs / benchmark.jsbenchmark
 browserify / browserify
  jeromedecoster / opn-cli
  documentationjs / documentation
  babel / babel@babel/core


