
MangaTranslator
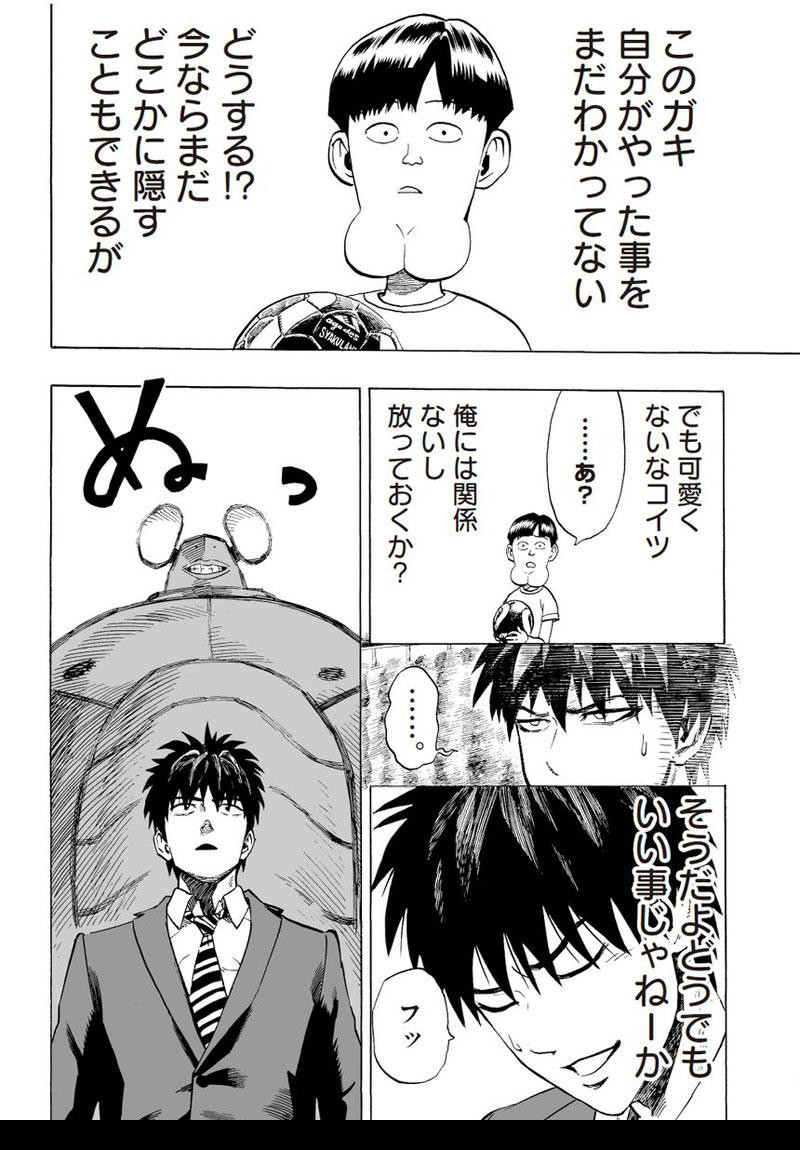
Gradio-based web application for automating the translation of manga/comic page images using AI. Targets speech bubbles and text outside of speech bubbles. Supports 59 languages and custom font pack usage.
| Original | Translated (w/ a single click) |
|---|---|
 |
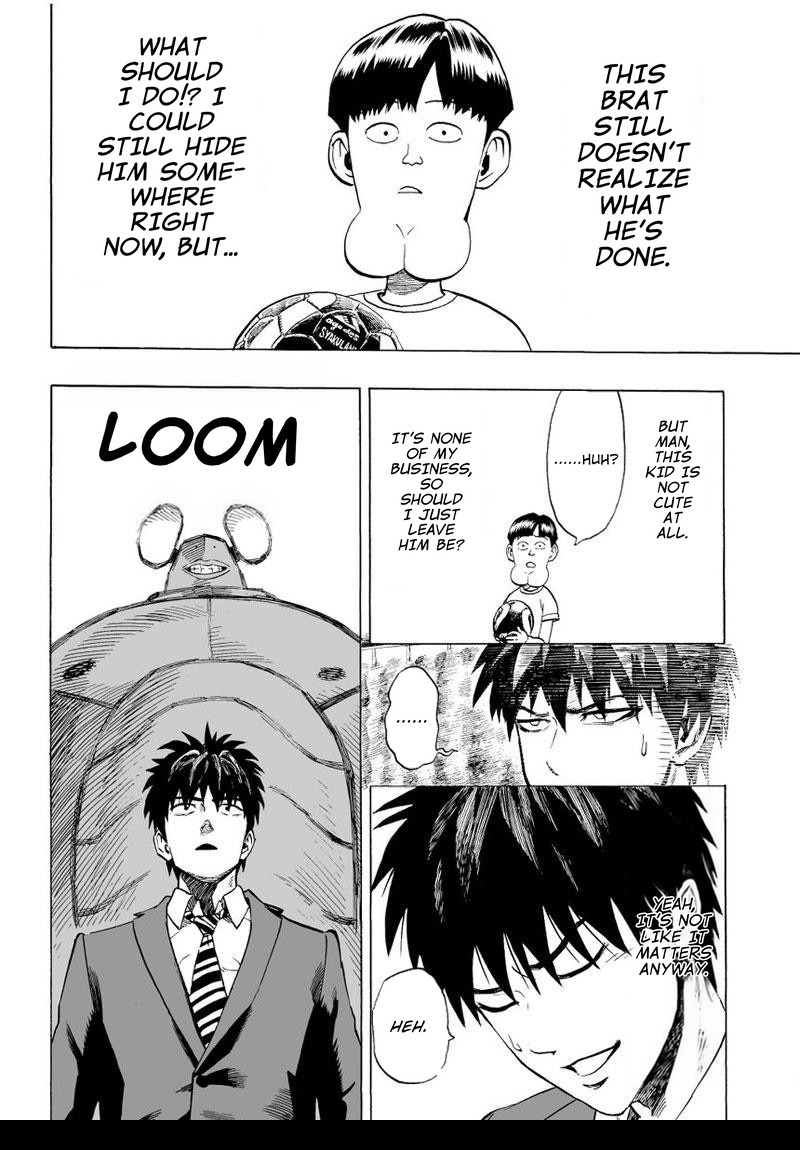 |
Table of Contents
Features
- Detection: Speech bubble detection & segmentation (YOLO, SAM 2.1/3)
- Cleaning: Inpaint speech bubbles and OSB text (FLUX.2 Klein, FLUX.1 Kontext, or OpenCV)
- Translation: LLM-powered OCR & translation (59 languages)
- Rendering: Text rendering with alignment and custom font packs
- Upscaling: 2x-AnimeSharpV4 for enhanced output quality
- Processing: Single/batch processing with directory preservation and ZIP support
- Interfaces: Web UI (Gradio) and CLI
- Automation: One-click translation; no intervention required
Requirements
- Python 3.10+
- PyTorch (CPU, CUDA, ROCm, XPU, MPS)
- Font pack with
.ttf/.otffiles; included with portable package - LLM for Japanese source text; VLM for other languages (API or local)
Install
Portable Package (Recommended)
Download the standalone zip from the releases page: Portable Build
Requirements:
- Windows: Bundled Python/Git included; no additional requirements
- Linux/macOS: Python 3.10+ and Git must be installed on your system
Setup:
- Extract the zip file
- Run the setup script for your platform:
- Windows: Double-click
setup.bat - Linux/macOS: Run
./setup.shin terminal
- Windows: Double-click
- PyTorch version is automatically detected and installed based on your system
- Open the launcher script created in
./MangaTranslator/:- Windows:
start-webui.bat - Linux/macOS:
start-webui.sh
- Windows:
Included font packs:
- Komika (normal text)
- Comicka (normal/OSB text)
- Roboto (supports accents)
- Noto Sans SC (Simplified Chinese)
- Noto Sans KR (Korean)
- Noto Sans JP (Japanese)
[!TIP] In the event that you need to transfer to a fresh portable package:
- You can safely move the
fonts,models, andoutputdirectories to the new portable package- You might be able to move the
runtimedirectory over, assuming the same setup configuration is wanted
Manual install
- Clone and enter the repo
git clone https://github.com/meangrinch/MangaTranslator.git
cd MangaTranslator
- Create and activate a virtual environment (recommended)
python -m venv venv
# Windows PowerShell/CMD
.\venv\Scripts\activate
# Linux/macOS
source venv/bin/activate
- Install PyTorch (see: PyTorch Install)
# Example (CUDA 13.0)
pip install torch==2.11.0+cu130 torchvision==0.26.0+cu130 --extra-index-url https://download.pytorch.org/whl/cu130
# Example (ROCm 7.1)
pip install torch==2.11.0+rocm7.1 torchvision==0.26.0+rocm7.1 --extra-index-url https://download.pytorch.org/whl/rocm7.1
# Example (XPU)
pip install torch==2.11.0+xpu torchvision==0.26.0+xpu --extra-index-url https://download.pytorch.org/whl/xpu
# Example (MPS/CPU)
pip install torch==2.11.0 torchvision==0.26.0
- Install Nunchaku (optional, for FLUX.1 Kontext via Nunchaku backend)
- Nunchaku wheels are not on PyPI. Install directly from the v1.3.0dev20260213 GitHub release URL, matching your OS and Python version. CUDA only, and requires a 2000-series card or newer.
# Example (Windows, Python 3.13, PyTorch 2.11.0, CUDA 13.0)
pip install https://github.com/nunchaku-ai/nunchaku/releases/download/v1.3.0dev20260213/nunchaku-1.3.0.dev20260213+cu13.0torch2.11-cp313-cp313-win_amd64.whl

# Example (Linux, Python 3.13, PyTorch 2.11.0, CUDA 13.0)
pip install https://github.com/nunchaku-ai/nunchaku/releases/download/v1.3.0dev20260213/nunchaku-1.3.0.dev20260213+cu13.0torch2.11-cp313-cp313-linux_x86_64.whl
[!NOTE] Nunchaku is not necessary for the use of Flux models via the sd.cpp/SDNQ backends.
- Install dependencies
pip install -r requirements.txt
Post-Install Setup
Models
- The application will automatically download and use all required models
Fonts
- Put font packs as subfolders in
fonts/with.otf/.ttffiles - Prefer filenames that include
italic/boldor both so variants are detected - Example structure:
fonts/
├─ CC Wild Words/
│  ├─ CCWildWords-Regular.otf
│  ├─ CCWildWords-Italic.otf
│  ├─ CCWildWords-Bold.otf
│  └─ CCWildWords-BoldItalic.otf
└─ Komika/
   ├─ KOMIKA-HAND.ttf
   └─ KOMIKA-HANDBOLD.ttf
LLM setup
- Providers: Google, OpenAI, Anthropic, xAI, DeepSeek, Z.ai, Moonshot AI, Xiaomi MiMo, OpenRouter, OpenAI-Compatible
- Web UI: configure provider/model/key in the Config tab (stored locally)
- CLI: pass keys/URLs as flags or via env vars
- Env vars:
GOOGLE_API_KEY,OPENAI_API_KEY,ANTHROPIC_API_KEY,XAI_API_KEY,DEEPSEEK_API_KEY,ZAI_API_KEY,MOONSHOT_API_KEY,MIMO_API_KEY,OPENROUTER_API_KEY,OPENAI_COMPATIBLE_API_KEY - OpenAI-compatible default URL:
http://localhost:8080/v1
[!NOTE] YanoljaNEXT-Rosetta models (e.g.,
yanolja/YanoljaNEXT-Rosetta-4B-2511-GGUF) are automatically detected when used via the OpenAI-Compatible provider and receive optimized prompting. These are text-only models and require two-step + local OCR model. The Special Instructions field is mapped to Rosetta's translation glossary (one entry per line, e.g.,Yanolja NEXT -> 야놀자넥스트).
OSB text setup (optional)
If you want to use the OSB text pipeline, you need a Hugging Face token with access to the following repositories:
deepghs/AnimeText_yolo
Steps to create a token:
- Sign in or create a Hugging Face account
- Visit and accept the terms on:
- AnimeText_yolo
- FLUX.1 Kontext (dev) (optional, if using FLUX.1 Kontext via Nunchaku backend)
- SAM 3 (optional, if using SAM 3)
- Create a new access token in your Hugging Face settings with read access to gated repos ("Read access to contents of public gated repos")
- Add the token to the app:
- Web UI: set
hf_tokenin Config - Env var (alternative): set
HF_TOKEN
- Web UI: set
- Save config to preserve the token across sessions
Run
Web UI (Gradio)
- Portable package:
- Windows: Double-click
start-webui.batinside theMangaTranslatorfolder - Linux/macOS: Run
./start-webui.shinside theMangaTranslatorfolder
- Windows: Double-click
- Manual install:
- Windows: Run
python app.py --open-browser
- Windows: Run
Options: --models (default ./models), --fonts (default ./fonts), --port (default 7676), --cpu.
First launch can take ~1–2 minutes.
Once launched, configure your LLM provider in the Config tab, then upload images and click Translate.
CLI
Examples:
# Single image, Japanese → English, Google provider
python main.py --input <image_path> \
  --font-dir "fonts/Komika" --provider Google --google-api-key <AI...>

# Batch folder, custom source/target languages, OpenAI-Compatible provider (llama.cpp)
python main.py --input <folder_path> --batch \
  --font-dir "fonts/Komika" \
  --input-language <src_lang> --output-language <tgt_lang> \
  --provider OpenAI-Compatible --openai-compatible-url http://localhost:8080/v1 \
  --output ./output

# Single Image, Japanese → English (Google), OSB text pipeline, custom OSB text font
python main.py --input <image_path> \
  --font-dir "fonts/Komika" --provider Google --google-api-key <AI...> \
  --osb-enable --osb-font-dir "fonts/Clementine"

# Cleaning-only mode (no translation/text rendering)
python main.py --input <image_path> --cleaning-only

# Upscaling-only mode (no detection/translation, only upscale)
python main.py --input <image_path> --upscaling-only --image-upscale-mode final --image-upscale-factor 2.0

# Test mode (no translation; render placeholder text)
python main.py --input <image_path> --test-mode

# Full options
python main.py --help
Documentation
Updating
Portable Package
- Windows: Run
update.batfrom the portable package root - Linux/macOS: Run
./update.shfrom the portable package root
Manual Install
From the repo root:
git pull
pip install -r requirements.txt  # Or activate venv first if present
License & credits
ML Models & Libraries
- YOLOv8m Speech Bubble Detector: kitsumed
- Manga109 Speech Bubble Detector: huyvux3005
- Comic Speech Bubble Detector YOLOv8m: ogkalu
- Manga109 YOLO: deepghs
- AnimeText YOLO: deepghs
- SAM 2.1: Segment Anything in Images and Videos: Meta AI
- SAM 3: Meta AI
- Manga OCR: kha-white
- PaddleOCR-VL-1.5: PaddlePaddle
- FLUX.1 Kontext: Black Forest Labs
- FLUX.2 Klein 4B: Black Forest Labs
- FLUX.2 Klein 9B: Black Forest Labs
- Nunchaku: Nunchaku AI
- SDNQ Quants: Disty0
- Unsloth Quants: Unsloth
- stable-diffusion.cpp: leejet
- 2x-AnimeSharpV4: Kim2091