
MiroTalk Admin
A secure, modern web dashboard to manage MiroTalk updates, configuration, and settings with ease.
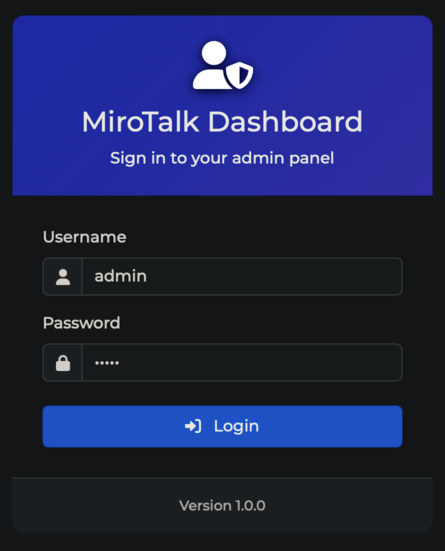
🚀 Quick Start
-
Clone the Repository and Set Up Backend
git clone https://github.com/miroslavpejic85/mirotalk-admin.git cd mirotalk-admin cp backend/config/index.template.js backend/config/index.js cp .env.template .env npm install npm start -
Open the Admin Dashboard
- Go to: http://localhost:9999/admin
- Default credentials:
- Username:
mirotalk - Password:
admin
- Username:
⚡ Quick Start with PM2
-
Install PM2 globally (if not already installed):
npm install -g pm2 -
Clone and set up the project:
git clone https://github.com/miroslavpejic85/mirotalk-admin.git cd mirotalk-admin cp backend/config/index.template.js backend/config/index.js cp .env.template .env npm install -
Start the server with PM2:
pm2 start backend/server.js --name mirotalk-admin -
View logs and manage the process:
pm2 logs mirotalk-admin pm2 status -
Access the Dashboard:
🐳 Quick Start with Docker
Note: Works only on
APP_MANAGE_MODE=ssh
-
Prepare Your Environment Files
git clone https://github.com/miroslavpejic85/mirotalk-admin.git cd mirotalk-admin cp backend/config/index.template.js backend/config/index.js cp .env.template .env cp docker-compose.template.yml docker-compose.yml -
Pull and Run with Docker Compose
docker pull mirotalk/admin:latest docker compose up -
Access the Dashboard
⚠️ Security Checklist
Important:
Before using MiroTalk Admin, update your environment settings to keep your instance secure.
🔐 Admin Dashboard
- Set
ADMIN_DASHBOARD_ENABLED=trueto enable the dashboard. - Change the default credentials:
-
ADMIN_USERNAME -
ADMIN_PASSWORD_HASH👉 generate it by running:
node backend/scripts/hashPassword.js -
ADMIN_JWT_SECRET👉 generate it by running:
node backend/scripts/generateJwtSecret.js
-
🛠️ Management Mode (APP_MANAGE_MODE)
Choose how you want to manage your MiroTalk instance:
-
Local Device Management (via SSH):
- Set
APP_MANAGE_MODE=ssh - Configure:
-
SSH_HOST -
SSH_PORT -
SSH_USERNAME -
SSH_PASSWORDorSSH_PRIVATE_KEY -
SSH_HOST_FINGERPRINT_SHA256— required. Pinned SHA-256 host-key fingerprint to prevent MITM.Obtain it with:
ssh-keyscan -t ed25519 <host> | ssh-keygen -lf - -E sha256Paste the resulting
SHA256:…value (or raw base64 / 64-char hex) into.env.
-
- Set
-
Self-Hosted with Docker:
- Set
APP_MANAGE_MODE=docker
- Set
-
Self-Hosted with PM2:
- Set
APP_MANAGE_MODE=pm2
- Set
Specify which instances you want to manage by listing their names (comma-separated), and provide the absolute paths to their directories:
APP_NAME=mirotalksfu,mirotalk,mirotalkc2c,mirotalkbro,mirotalkwebrtc,mirotalkadmin
MIROTALK_SFU_DIR=/root/mirotalksfu
MIROTALK_P2P_DIR=/root/mirotalk
MIROTALK_BRO_DIR=/root/mirotalkbro
MIROTALK_C2C_DIR=/root/mirotalkc2c
MIROTALK_WEB_DIR=/root/mirotalkwebrtc
MIROTALK_ADMIN_DIR=/root/mirotalk-admin
✅ Tip:
Regularly review and update your.envsettings to keep your MiroTalk instance secure and manageable.
🔒 TLS / HTTPS in Production
The dashboard listens on a single HTTPS port (ADMIN_PORT) via the
Node.js stdlib https module, plaintext HTTP requests on this port are
rejected at the TLS layer and cannot reach the application.
- Defense-in-depth: when
NODE_ENV=production, any request whosereq.secureis false (e.g. arriving through a misconfigured reverse proxy that did not setX-Forwarded-Proto: https) is 301-redirected to HTTPS forGET/HEADand rejected with403for any other method. Plaintextws://socket upgrades are likewise refused. - The bundled certificate in backend/ssl/ is self-signed
and intended for first-boot / local development only. For production,
either:
- replace
backend/ssl/key.pemandbackend/ssl/cert.pemwith a certificate issued by a trusted CA (e.g. Let's Encrypt), or - put the dashboard behind a TLS-terminating reverse proxy
(nginx, Caddy, Traefik, an ALB, etc.) and bind the dashboard to
127.0.0.1. When doing so, setTRUST_PROXY=trueso theX-Forwarded-ProtoandX-Forwarded-Forheaders are honored.
- replace
- Responses include
Strict-Transport-Security: max-age=63072000; includeSubDomainsto pin compliant browsers to HTTPS.
Local development with a trusted cert
The bundled backend/ssl/cert.pem is self-signed, so on the first visit
your browser will show a "Not secure / self-signed certificate" warning.
Click through it once (Chrome: type thisisunsafe on the warning page,
or Advanced → Proceed; Firefox: Accept the Risk and Continue) and
the dashboard at https://localhost:9999/admin will load.
To remove the warning entirely in development, install
mkcert and issue a cert that
your OS / browsers actually trust. Place the dev cert in
backend/ssl/dev/, the server auto-detects it when NODE_ENV is not
production and falls back to backend/ssl/ otherwise:
🍎 macOS
brew install mkcert nss
mkcert -install

mkdir -p backend/ssl/dev
cd backend/ssl/dev
mkcert -key-file key.pem -cert-file cert.pem localhost 127.0.0.1 ::1
🐧 Linux (Debian / Ubuntu)
sudo apt update
sudo apt install -y libnss3-tools
# install the mkcert binary (pick the latest release for your arch)
curl -fsSLo /tmp/mkcert "https://dl.filippo.io/mkcert/latest?for=linux/amd64"
sudo install -m 0755 /tmp/mkcert /usr/local/bin/mkcert
mkcert -install

mkdir -p backend/ssl/dev
cd backend/ssl/dev
mkcert -key-file key.pem -cert-file cert.pem localhost 127.0.0.1 ::1
On Fedora/RHEL use
sudo dnf install nss-tools; on Arch usesudo pacman -S nss mkcert. For Firefox to trust the cert, make surelibnss3-tools(ornss-tools) is installed before runningmkcert -install.
🪟 Windows (PowerShell, run as Administrator)
# Easiest path: Chocolatey
choco install mkcert
# …or Scoop:
# scoop bucket add extras; scoop install mkcert
mkcert -install

mkdir backend\ssl\dev
cd backend\ssl\dev
mkcert -key-file key.pem -cert-file cert.pem localhost 127.0.0.1 ::1
Firefox on Windows uses its own trust store. After
mkcert -install, restart Firefox so it picks up the new local CA. Chrome / Edge use the Windows trust store and work immediately.
backend/ssl/dev/ is gitignored, so the locally-trusted cert never
ships with the repo. In production the server always uses
backend/ssl/key.pem + backend/ssl/cert.pem, which should hold a
CA-issued cert (or be replaced by a TLS-terminating reverse proxy as
described above).
Restart the server and the lock icon will be green. The dev workflow is
otherwise unchanged, the dashboard is HTTPS-only in every environment
so behavior in dev matches production (Secure cookies, HSTS, mixed
content, wss:// upgrades, etc.).